Procurement click-thru demonstration
Procurement I
Author: Joseph Phillips
Steps: 36
1. To begin, click on "Budgets".

2. Following that, select the budget you want to use.

3. Scroll down to the budget code you want to link to the RFP and select the Procurement icon.

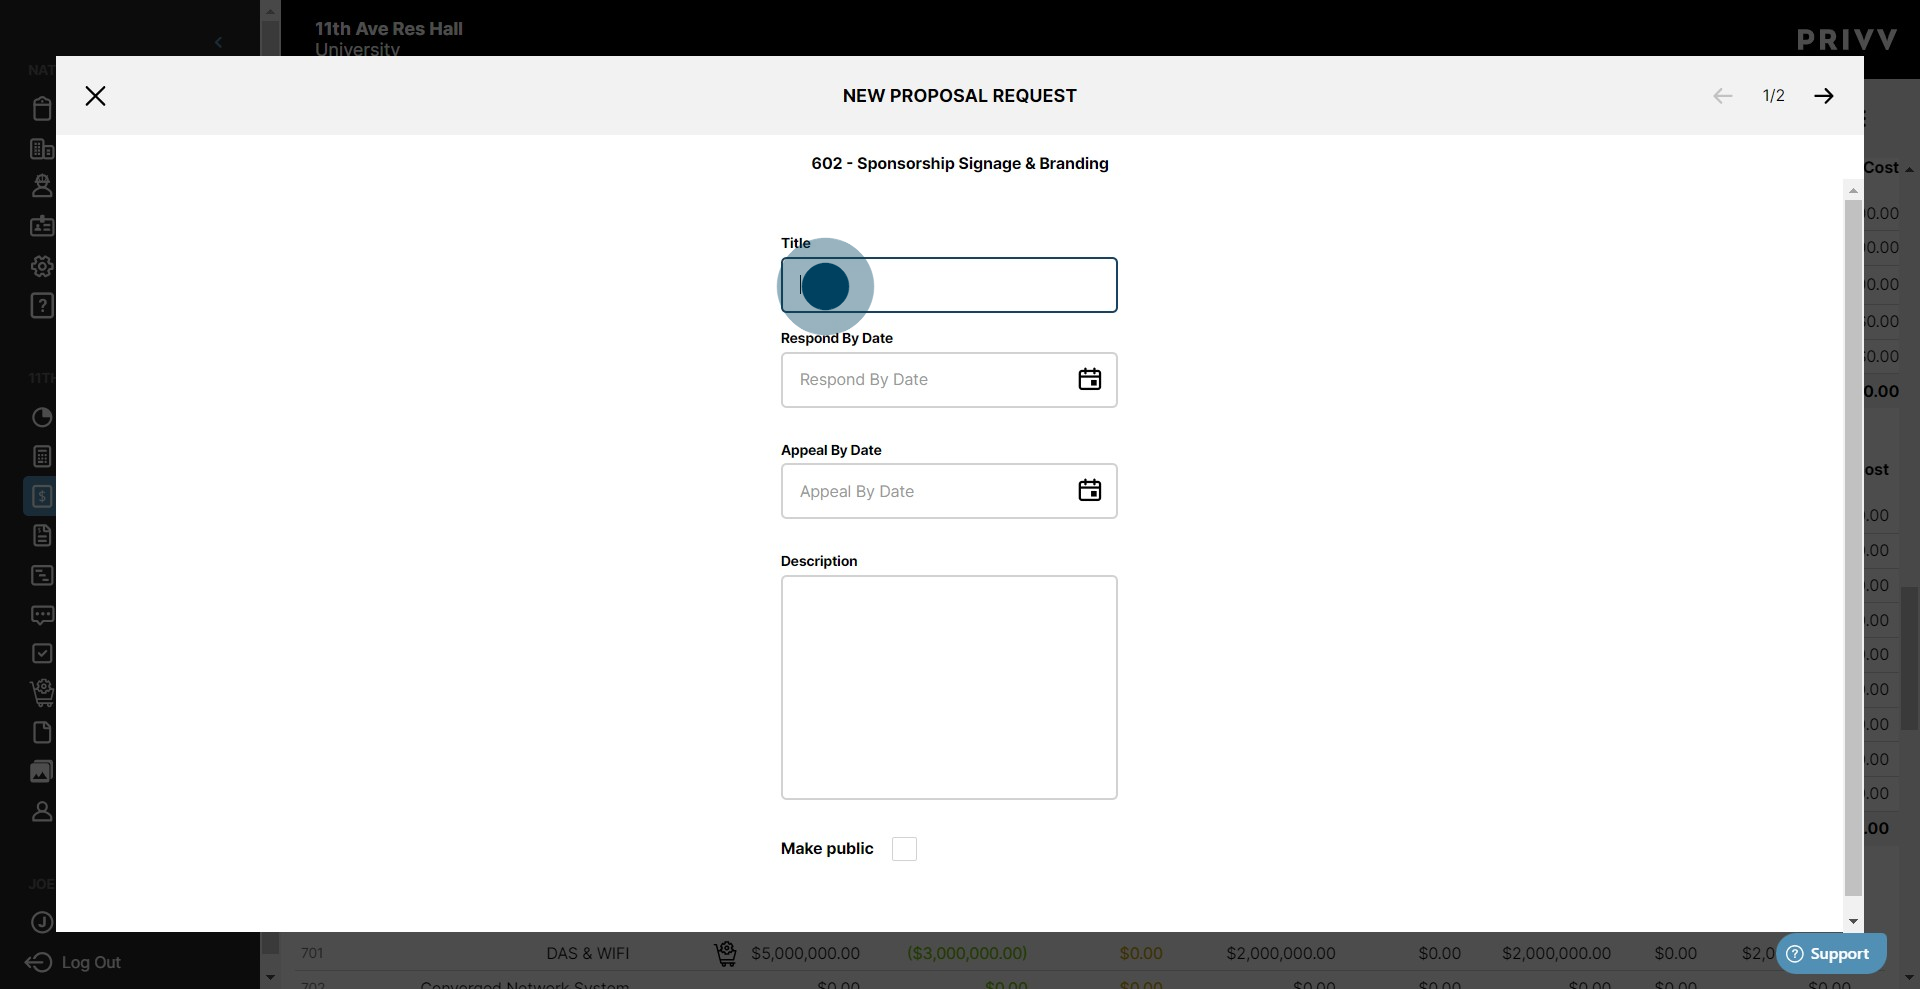
4. Once that's done, click on "New Proposal Request".

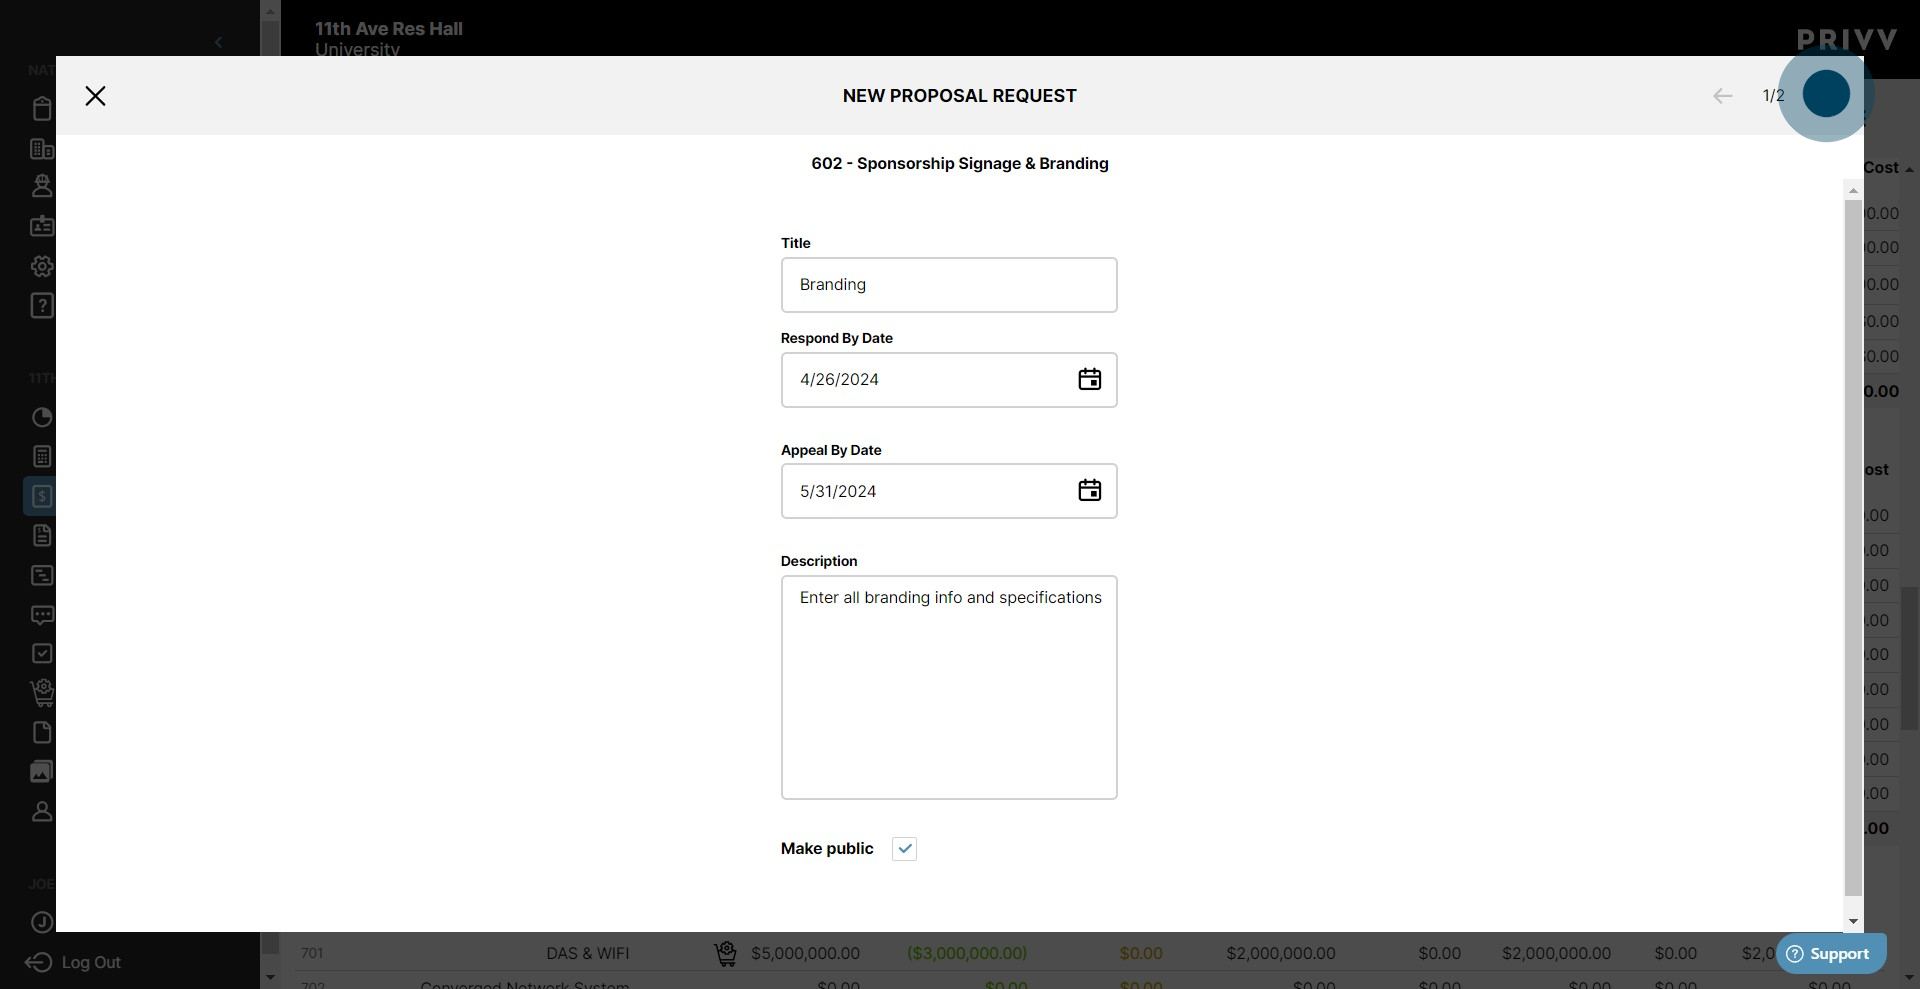
5. Next, enter the Title for your RFP within the selected input.
6. Select the 'Respond By' date. This is the deadline the vendors have to submit a response

7. Select the day of the month from the calendar window.

8. The 'Appeal By' Date lets the vendor know the deadline to protest & appeal the bid Award
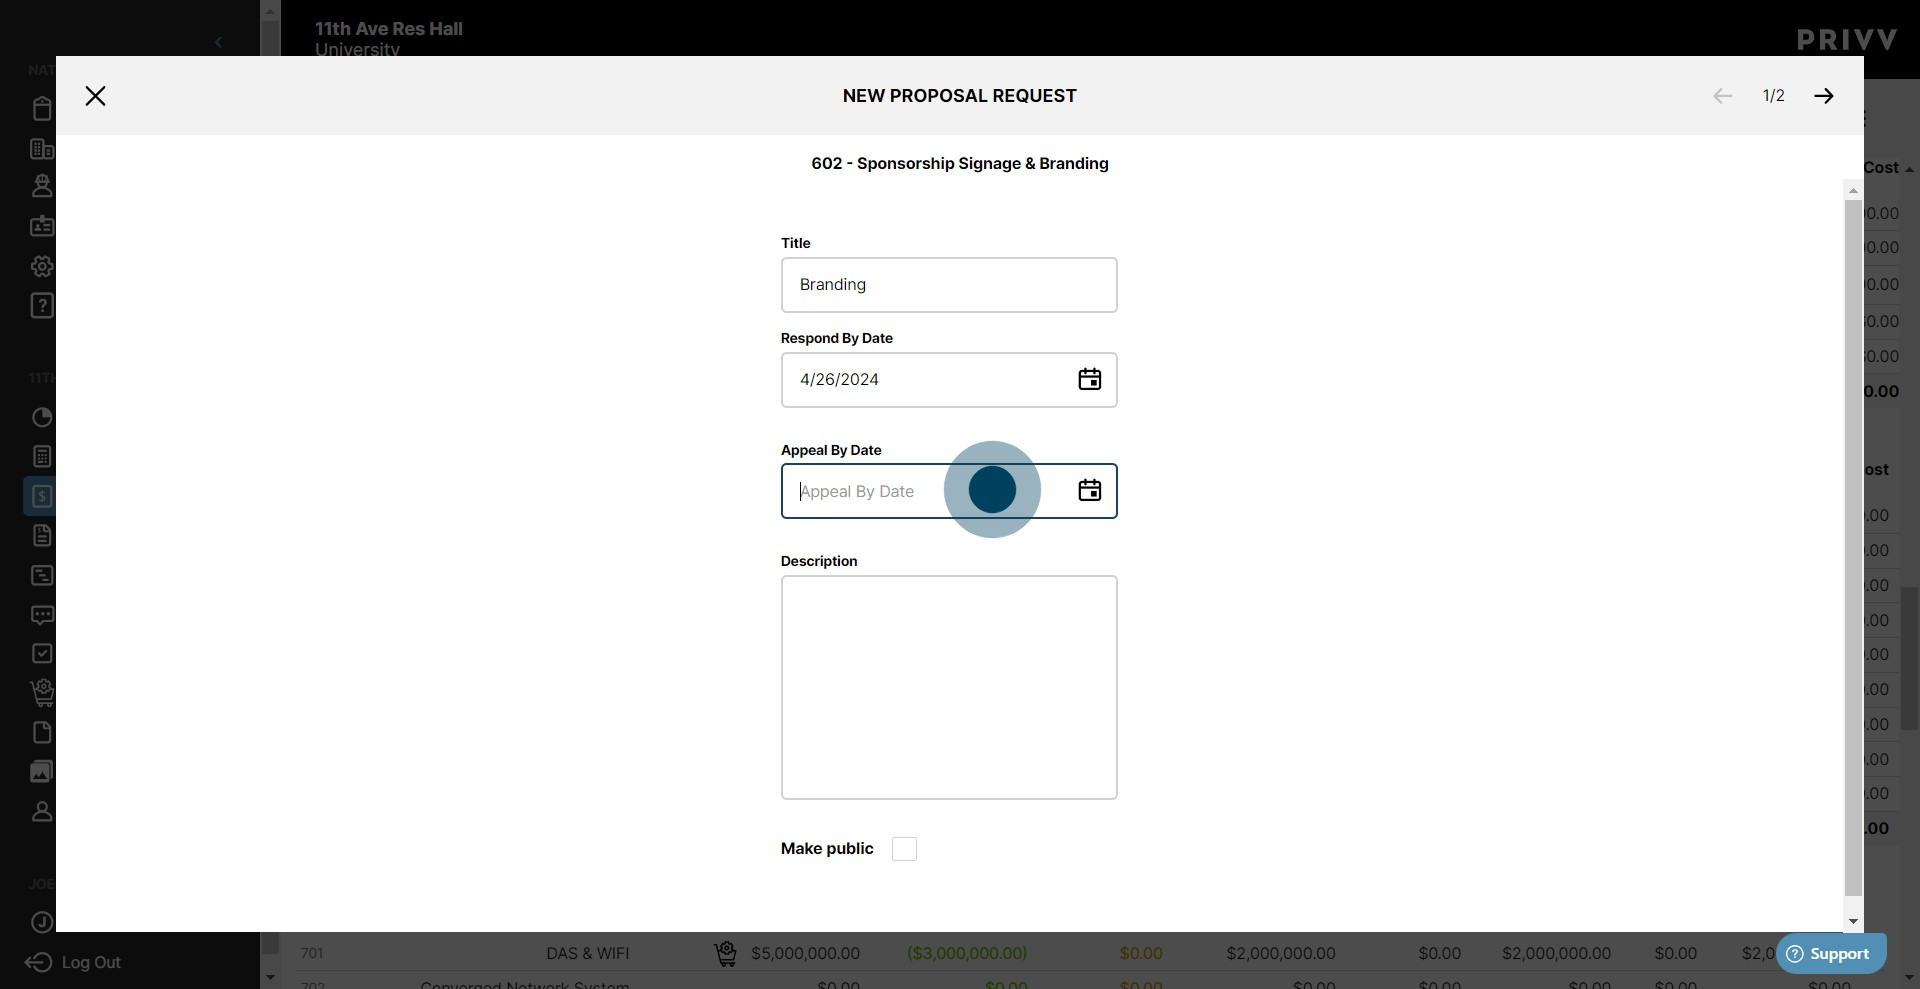
9. Select the date, if applicable, from the calendar window

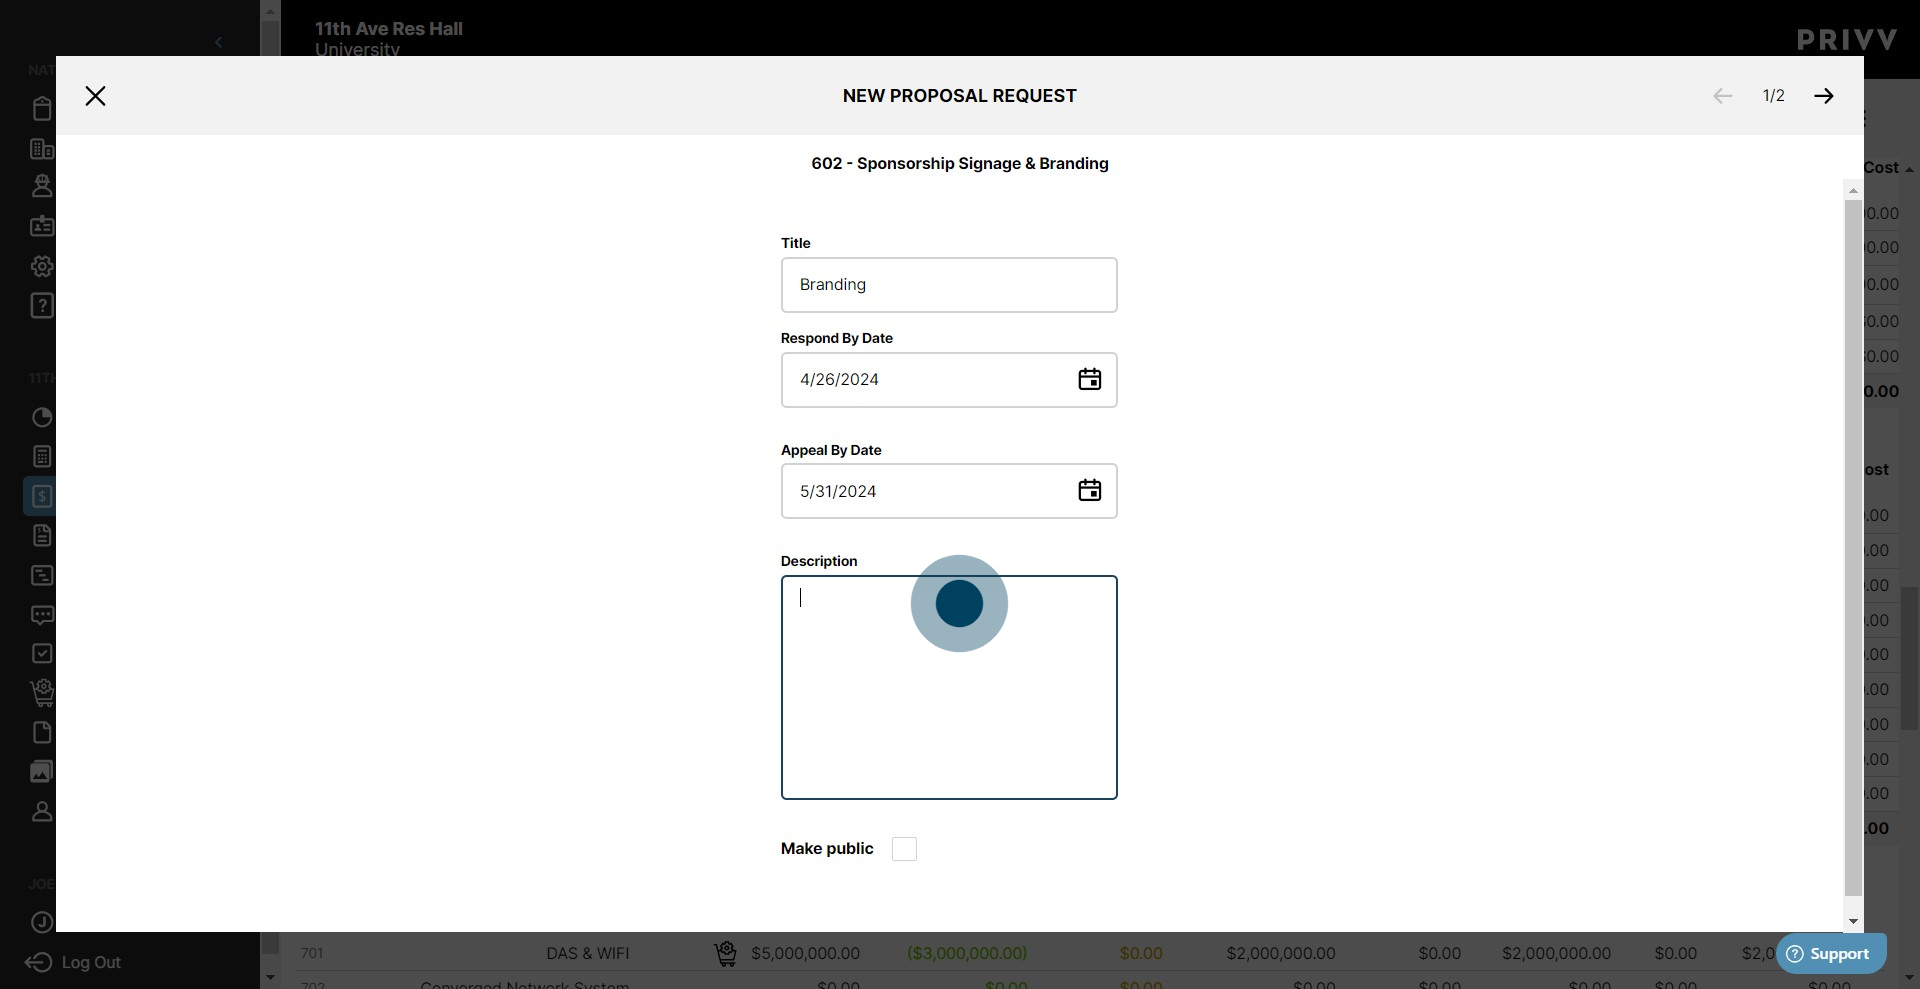
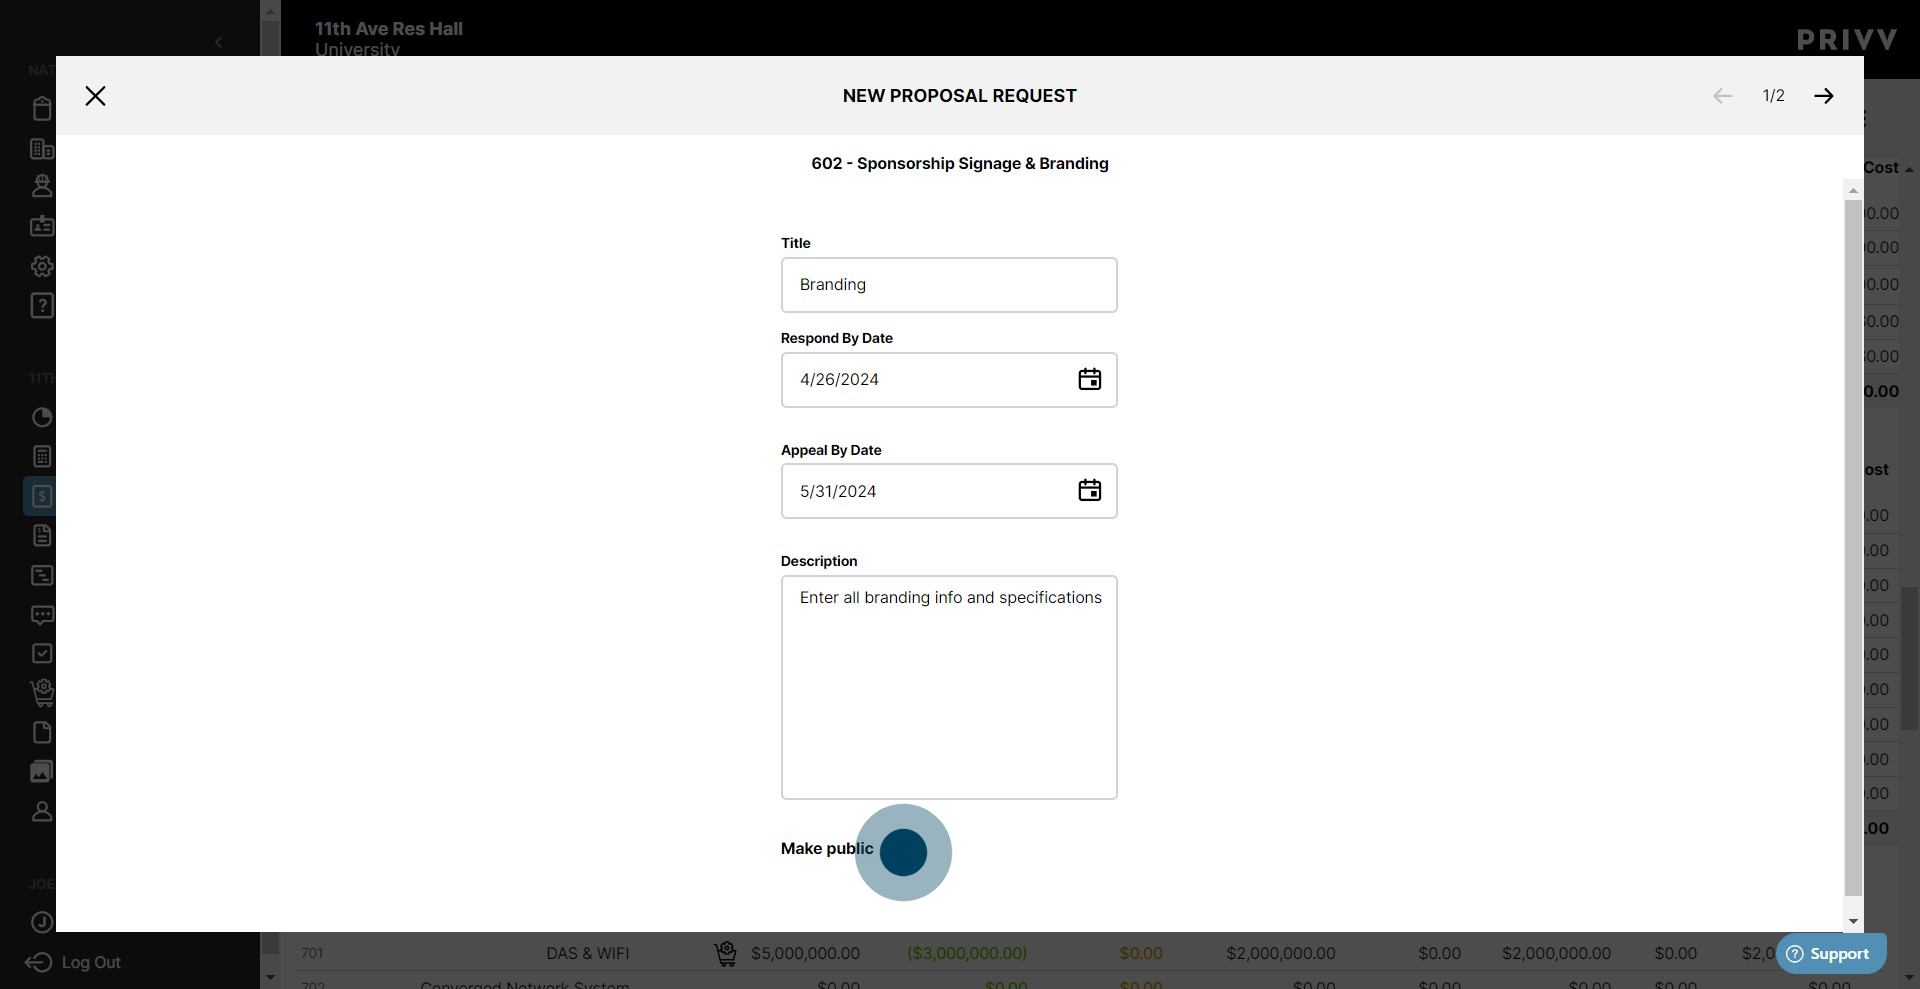
10. Enter any additional information or specifications regarding the RFP
11. If your RFP needs to be public, Check this box. A URL will be generated for your RFP for access from outside sources.
12. When you are finished click the green ✓.
13. Here is where you can enter specific line items for bidding. Enter a description here

14. Enter a number to specify quantity.
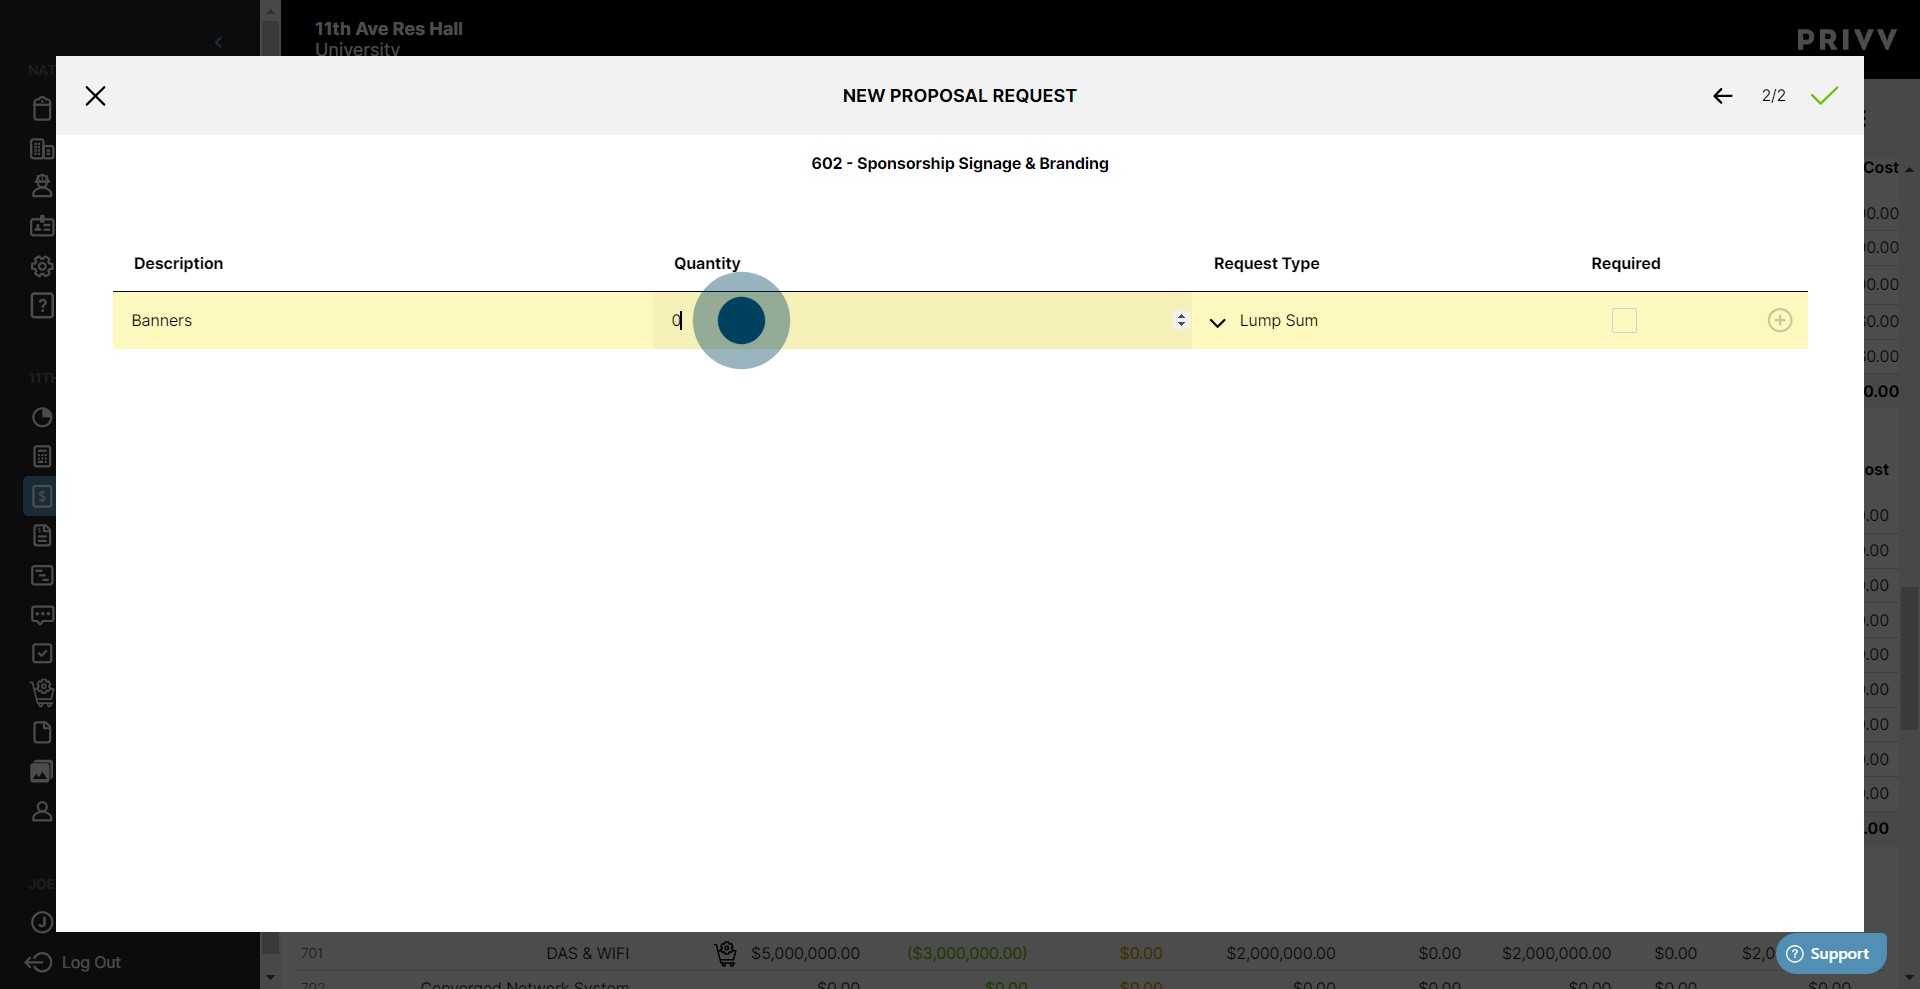
15. Afterwards, select whether you want the bid amount to be a 'Lump Sum' or a 'Per Item' cost.

16. Selecting 'Required' will force the vendor to answer this line item. If they do not answer all required line items, they will not be able to submit

17. Next up, click the + icon to add the line to the RFP.

18. Repeat the steps to add as many line items as necessary.

19. When you are finished, click the green ✓.

20. Your RFP will now appear on the corresponding budget code

21. You can select it from the dropdown.

22. Click on the info icon to see the RFP details

23. All of the information you have entered is saved to your RFP

24. Your RFP is in a 'Preparing' state. When you are ready to send it out, select the ⋮ symbol.

25. Next up, click on "Prepare".
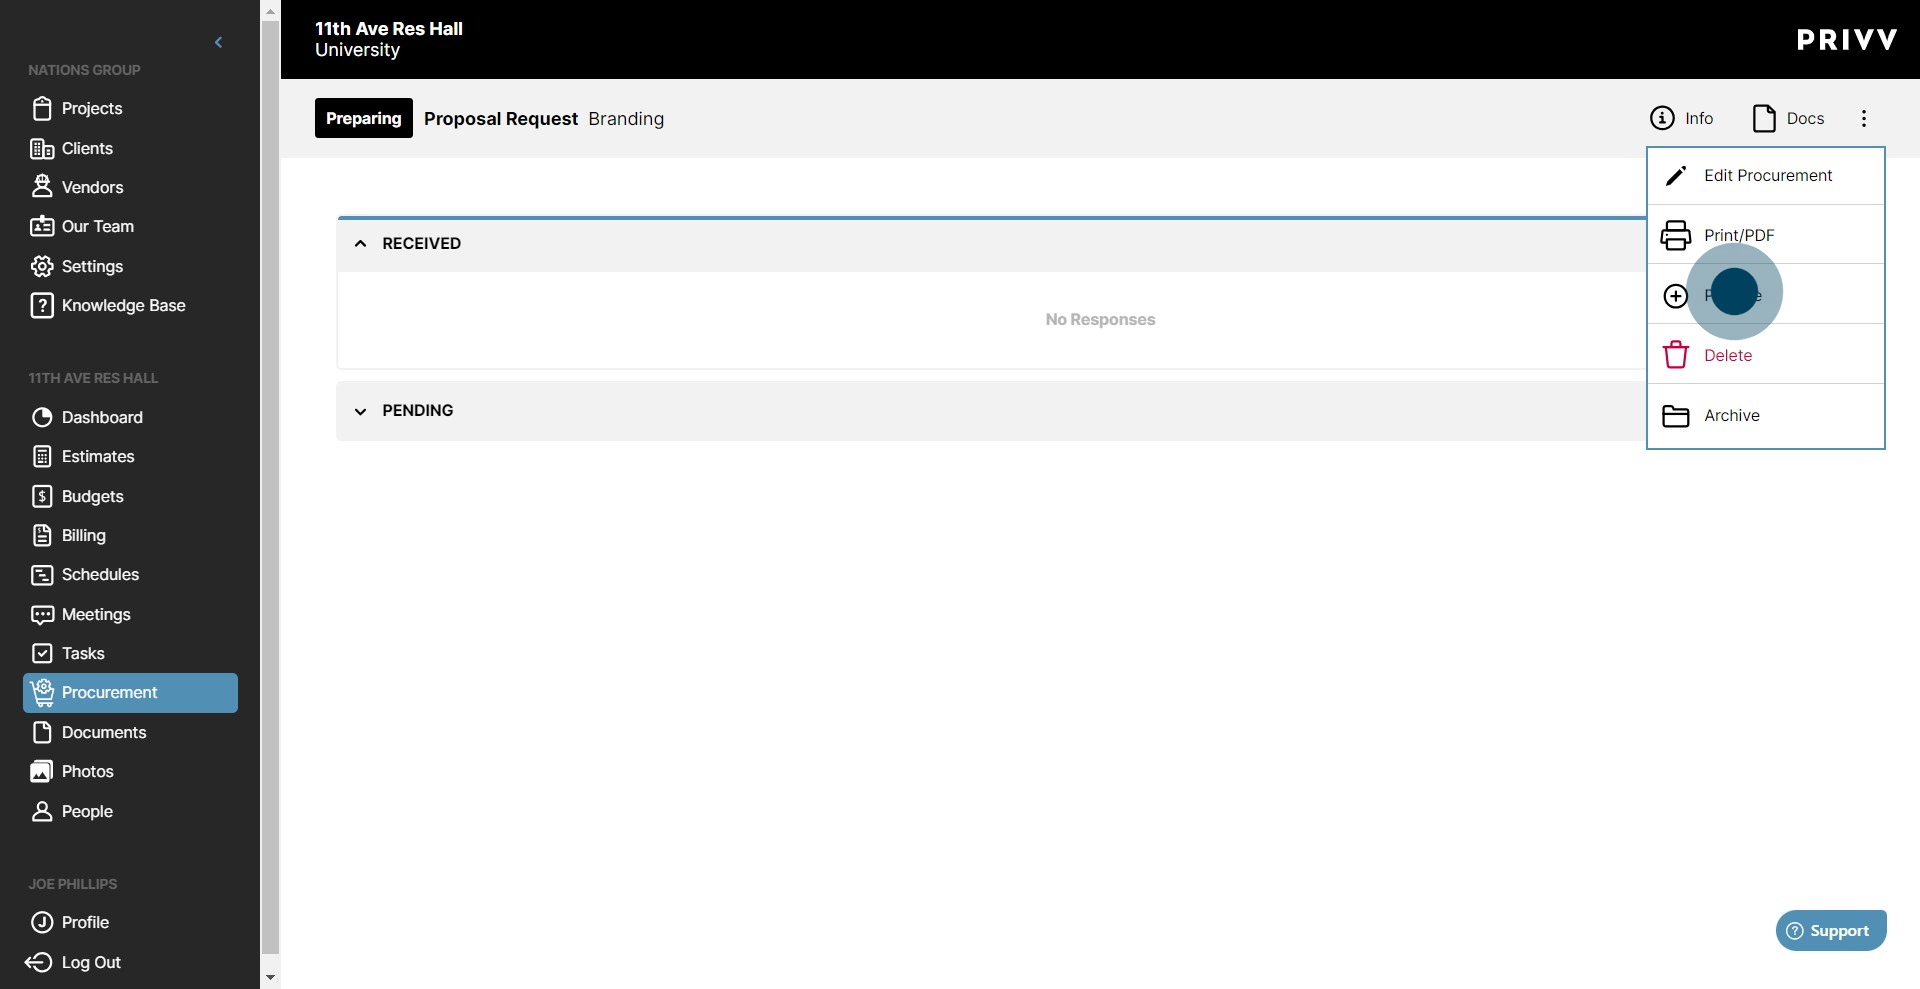
26. If you are sure you are ready to begin, click on "Prepare".

27. The RFP is now in the 'Waiting for Responses' state. To invite vendors to bid, click on the 'Invite' icon.

28. Click on Vendor column to select an existing vendor. If you would like to add a new vendor, you may do so by selecting 'Create a New Vendor' from the dropdown.

29. After, select the preferred contact from the next column, marked 'Contact'.

30. Check the 'Enforce Deadline' box to only allow submissions within the time specified on your RFP.

31. Uncheck the box to allow submissions past the due date
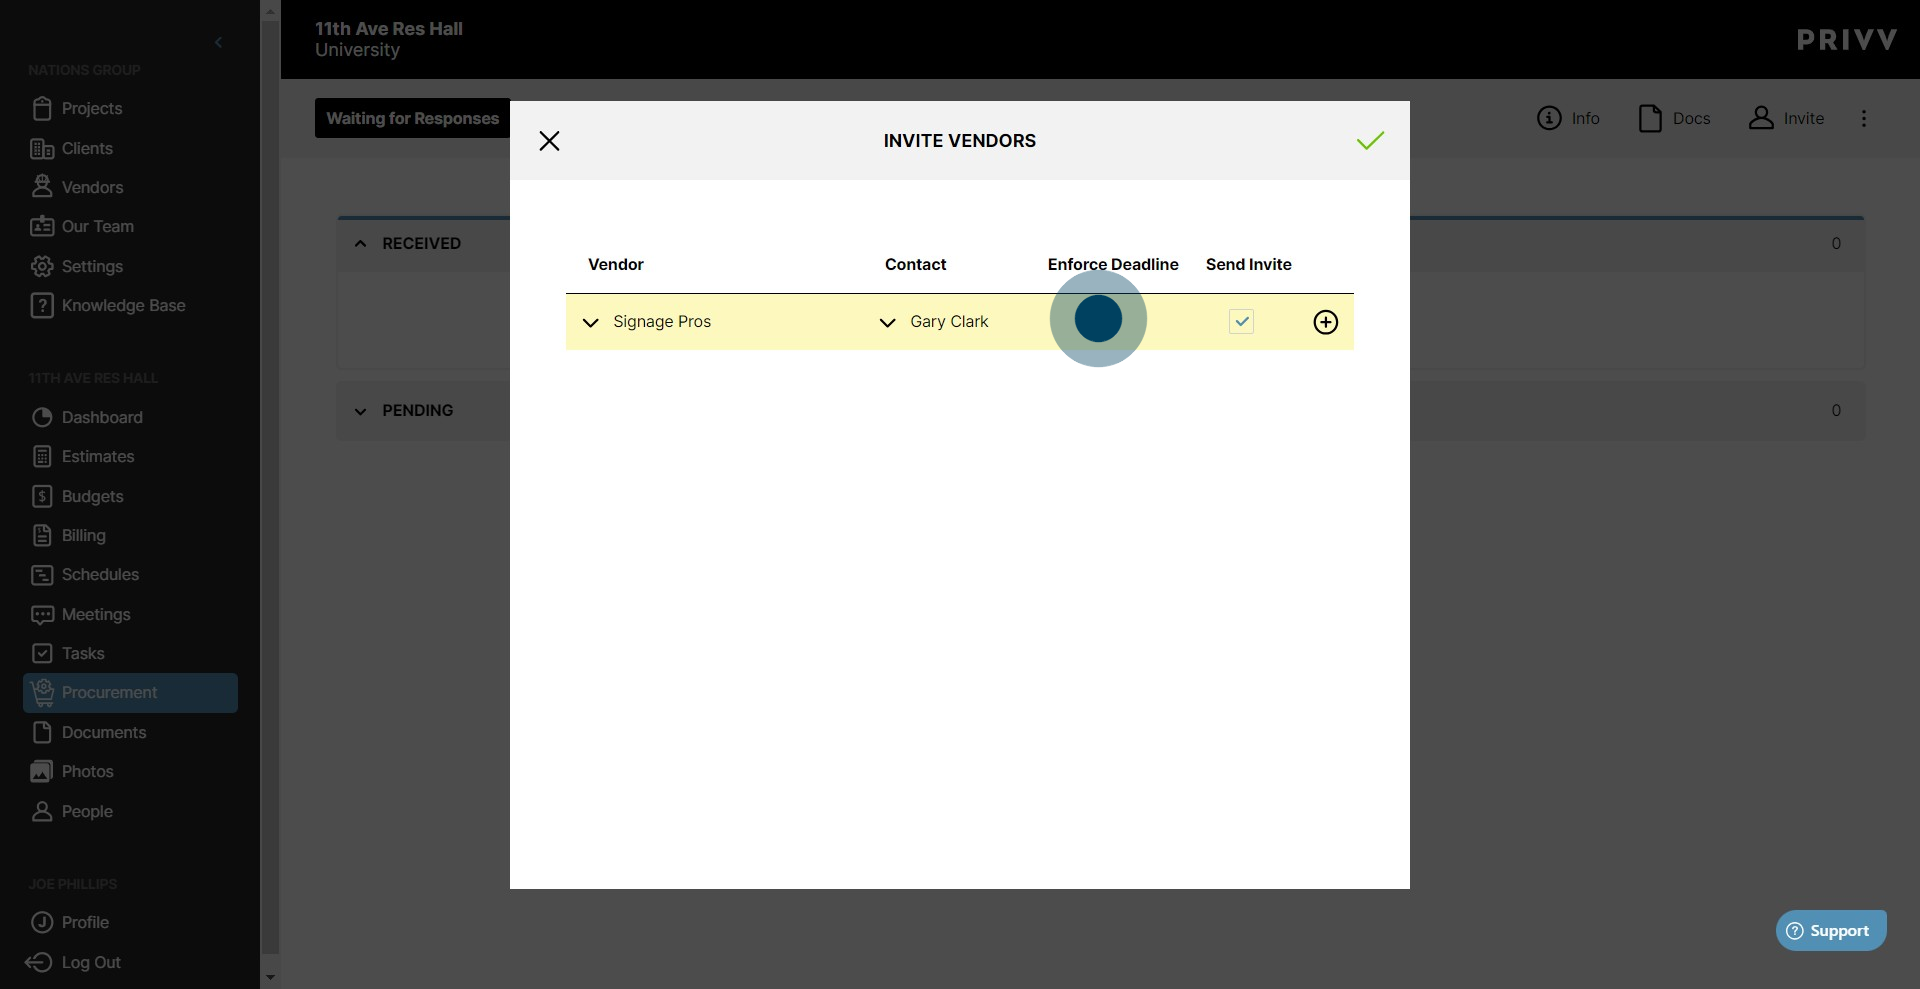
32. By default, the 'Send Invite' box will be checked and the invite will send out automatically. If you would like to log the vendors but wait to send invites, uncheck this box

33. Click the + icon to confirm the vendor.

34. When you have finished adding vendors to your invite list, click the green ✓

35. Your Pending invites will show here.

36. Click on "In Review" to track responses from Vendors.

Was this article helpful?
That’s Great!
Thank you for your feedback
Sorry! We couldn't be helpful
Thank you for your feedback
Feedback sent
We appreciate your effort and will try to fix the article