Author: Joseph Phillips
Steps: 26
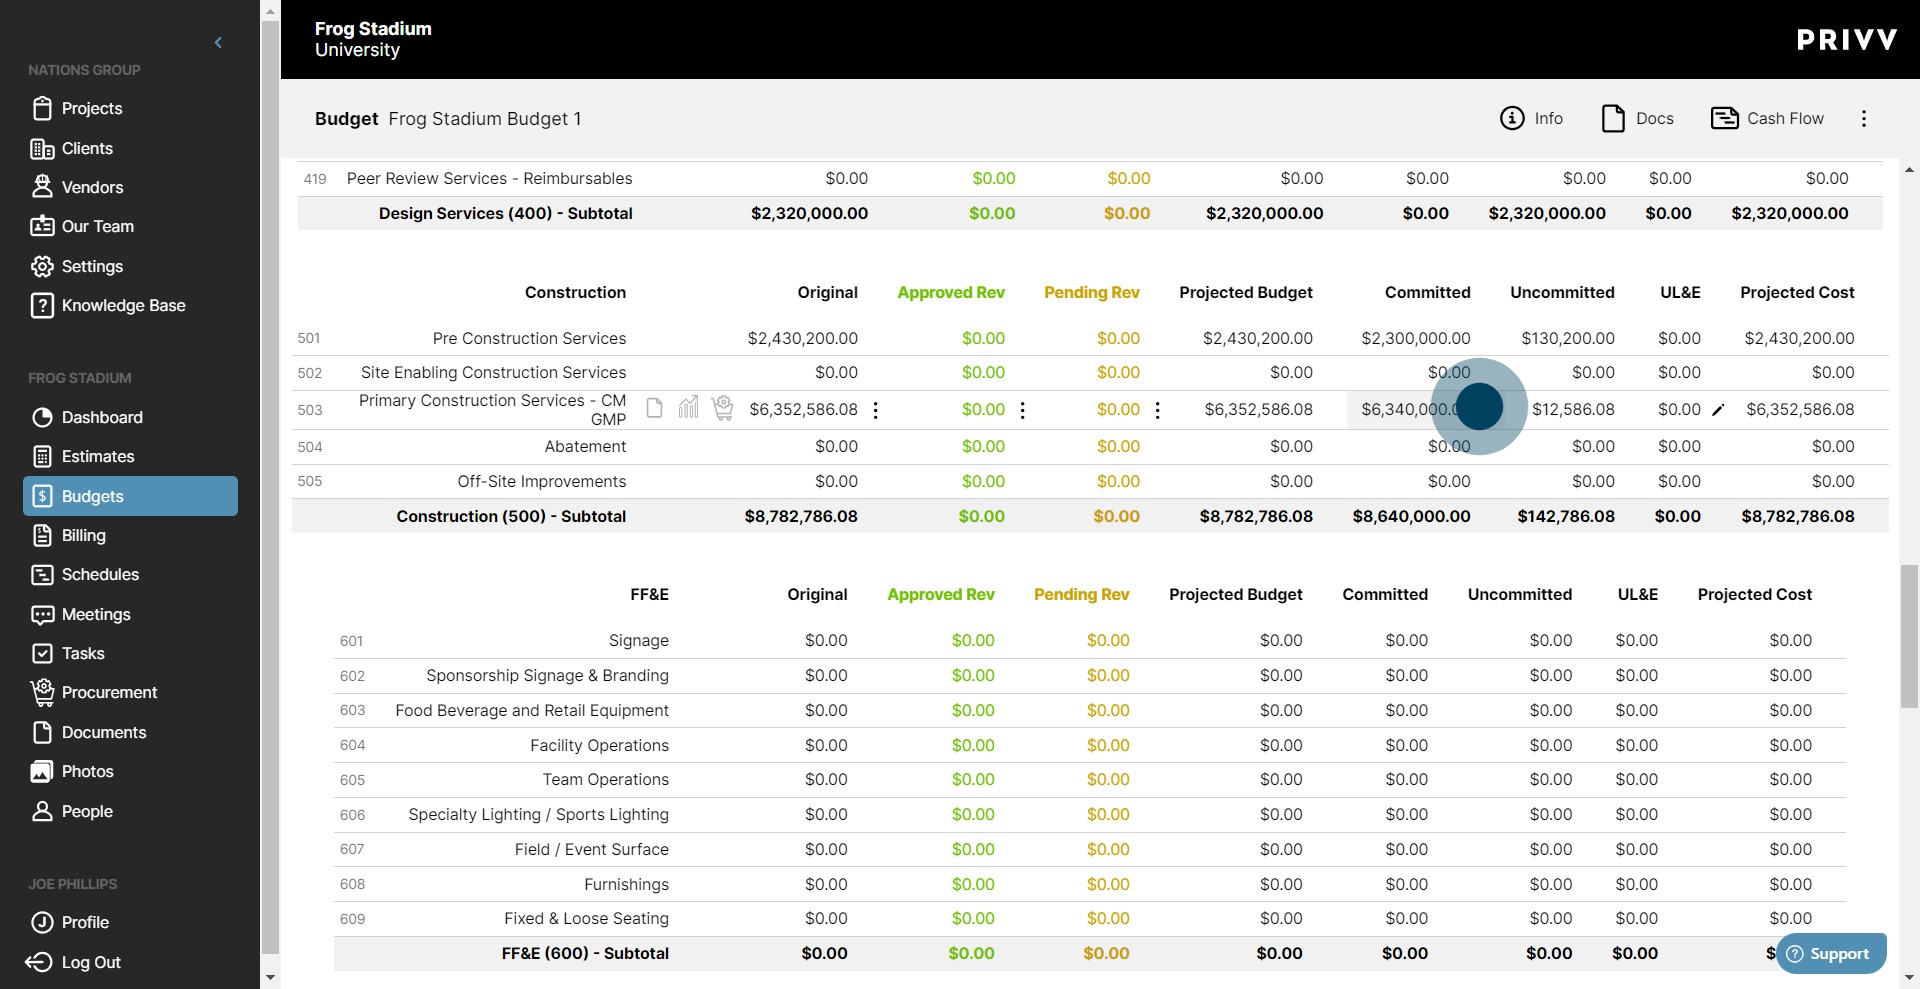
1. To commence, click on "Budgets".

2. Click on your Budget to go to the Budget Detail Screen.

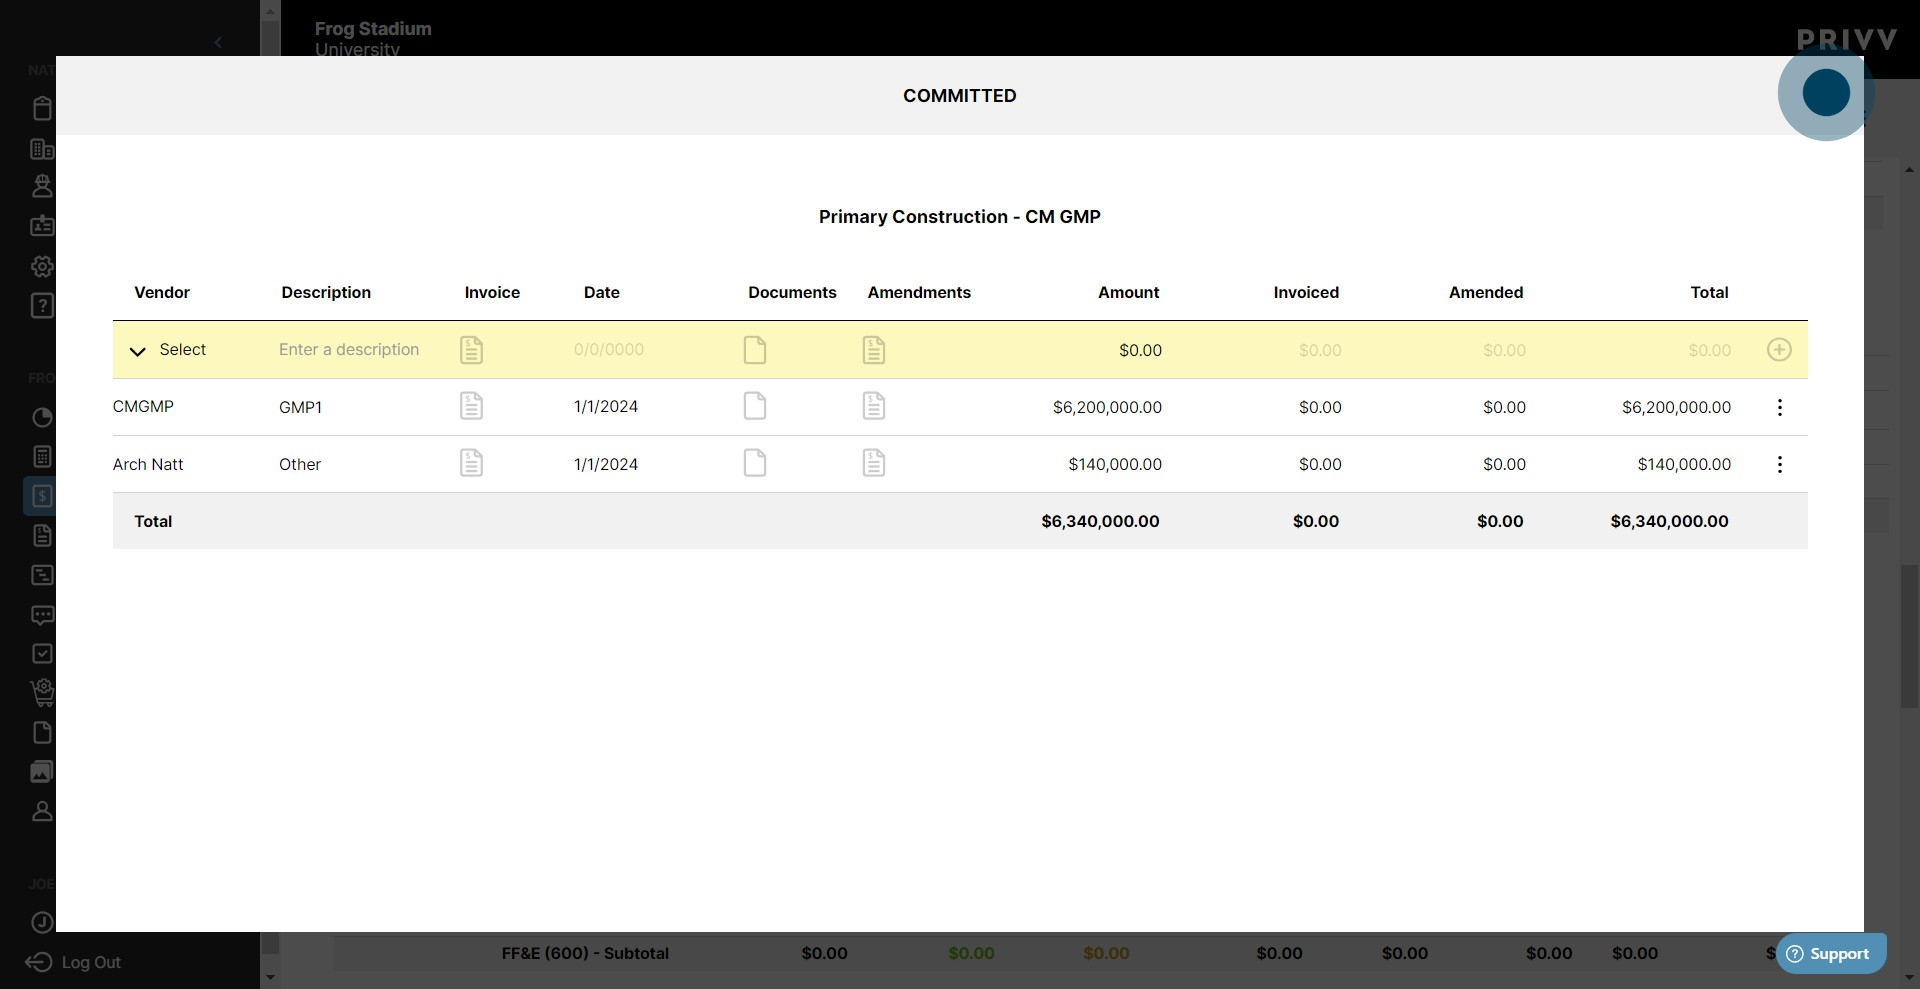
3. Click on the commitment for the vendor contract.
4. Find the vendor from whom you would like to request an invoice. Select the invoice icon in the column marked "Invoice"

5. After that, click on "Request Invoice from Vendor".

6. Select the pay application or create a new one from the dropdown list

7. Next, select the contact person who needs to receive the invite. This is typically the person in charge of the vendor accounts.

8. Enter any notes, instructions or important text in the notes section. This note will be sent with the invitation

9. When you are ready, click on the green check mark to request the invoice from the vendor.

10. Repeat steps to send additional requests for invoices. When you are done, click the green check mark to close the committed window
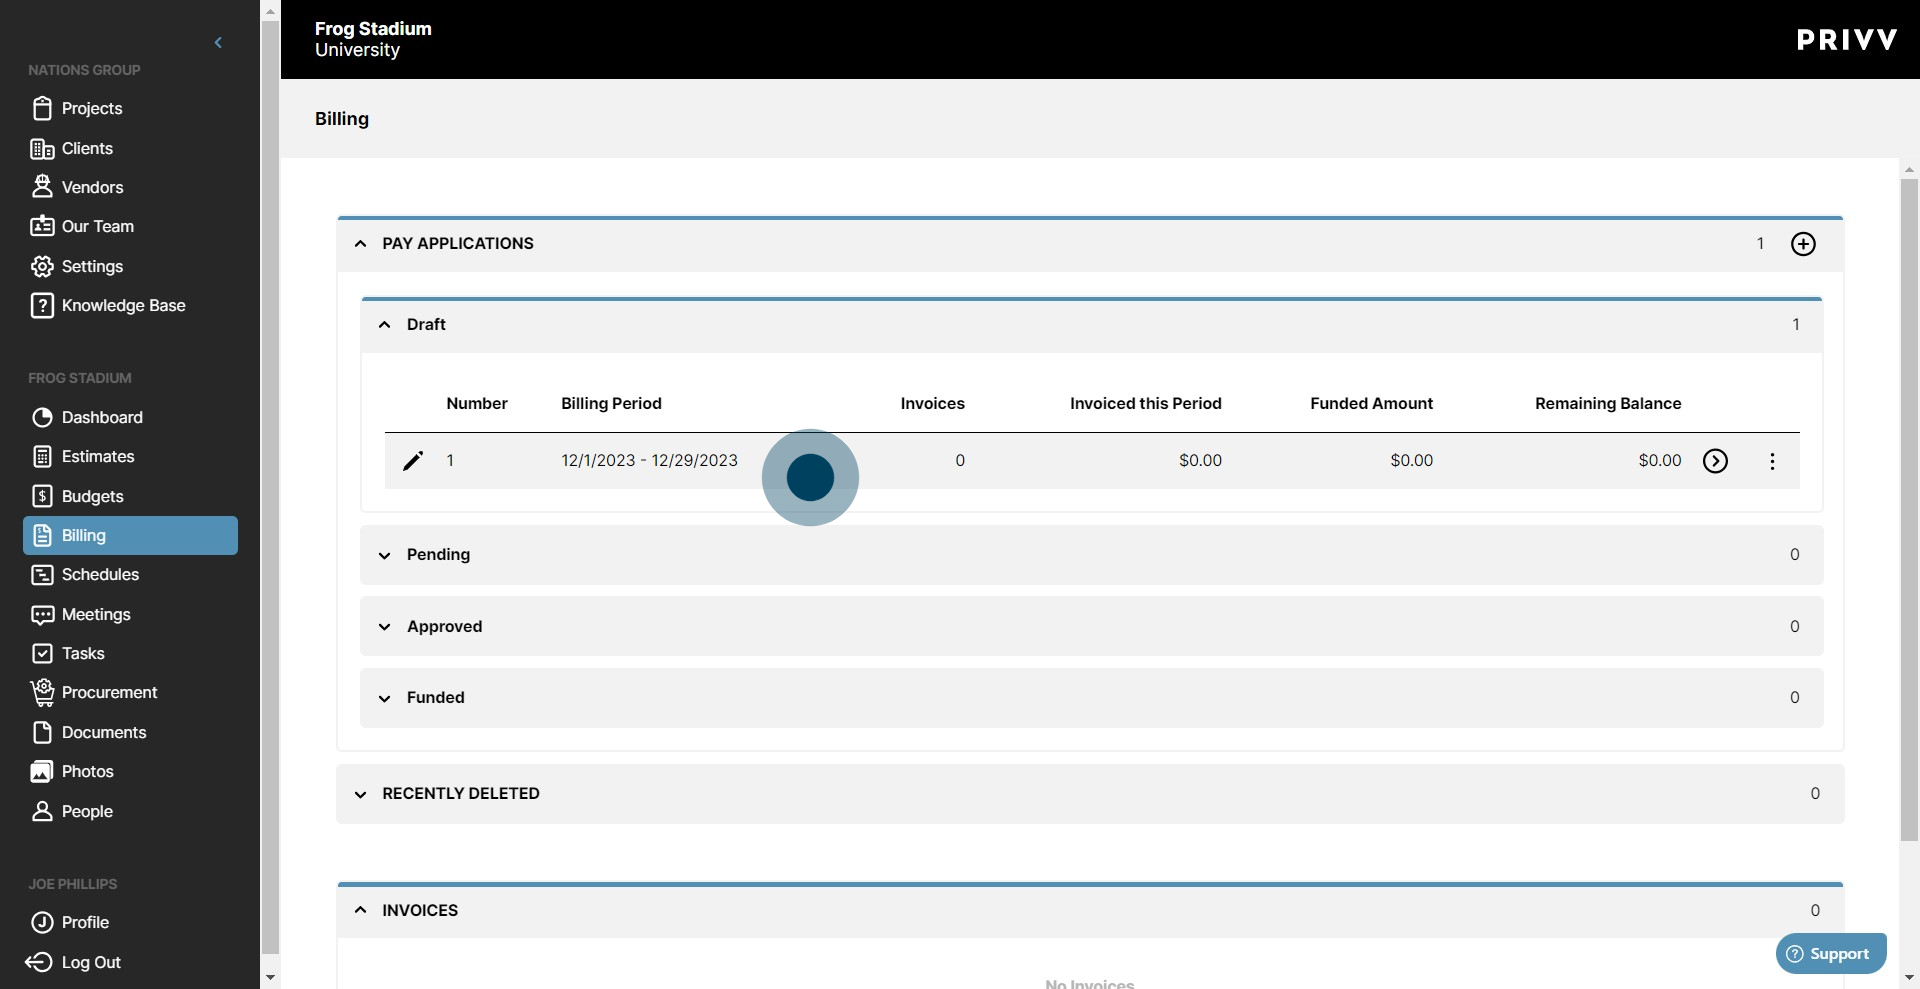
11. Click on "Billing" to see your pay application progress

12. Your draft Pay applications will show at the top of the page. Click on the pay app for more detail
13. You can also view, edit and add vendors to the pay in the expanded "Vendors" dropdown.

14. To resend the invite, click the "Resend" button.
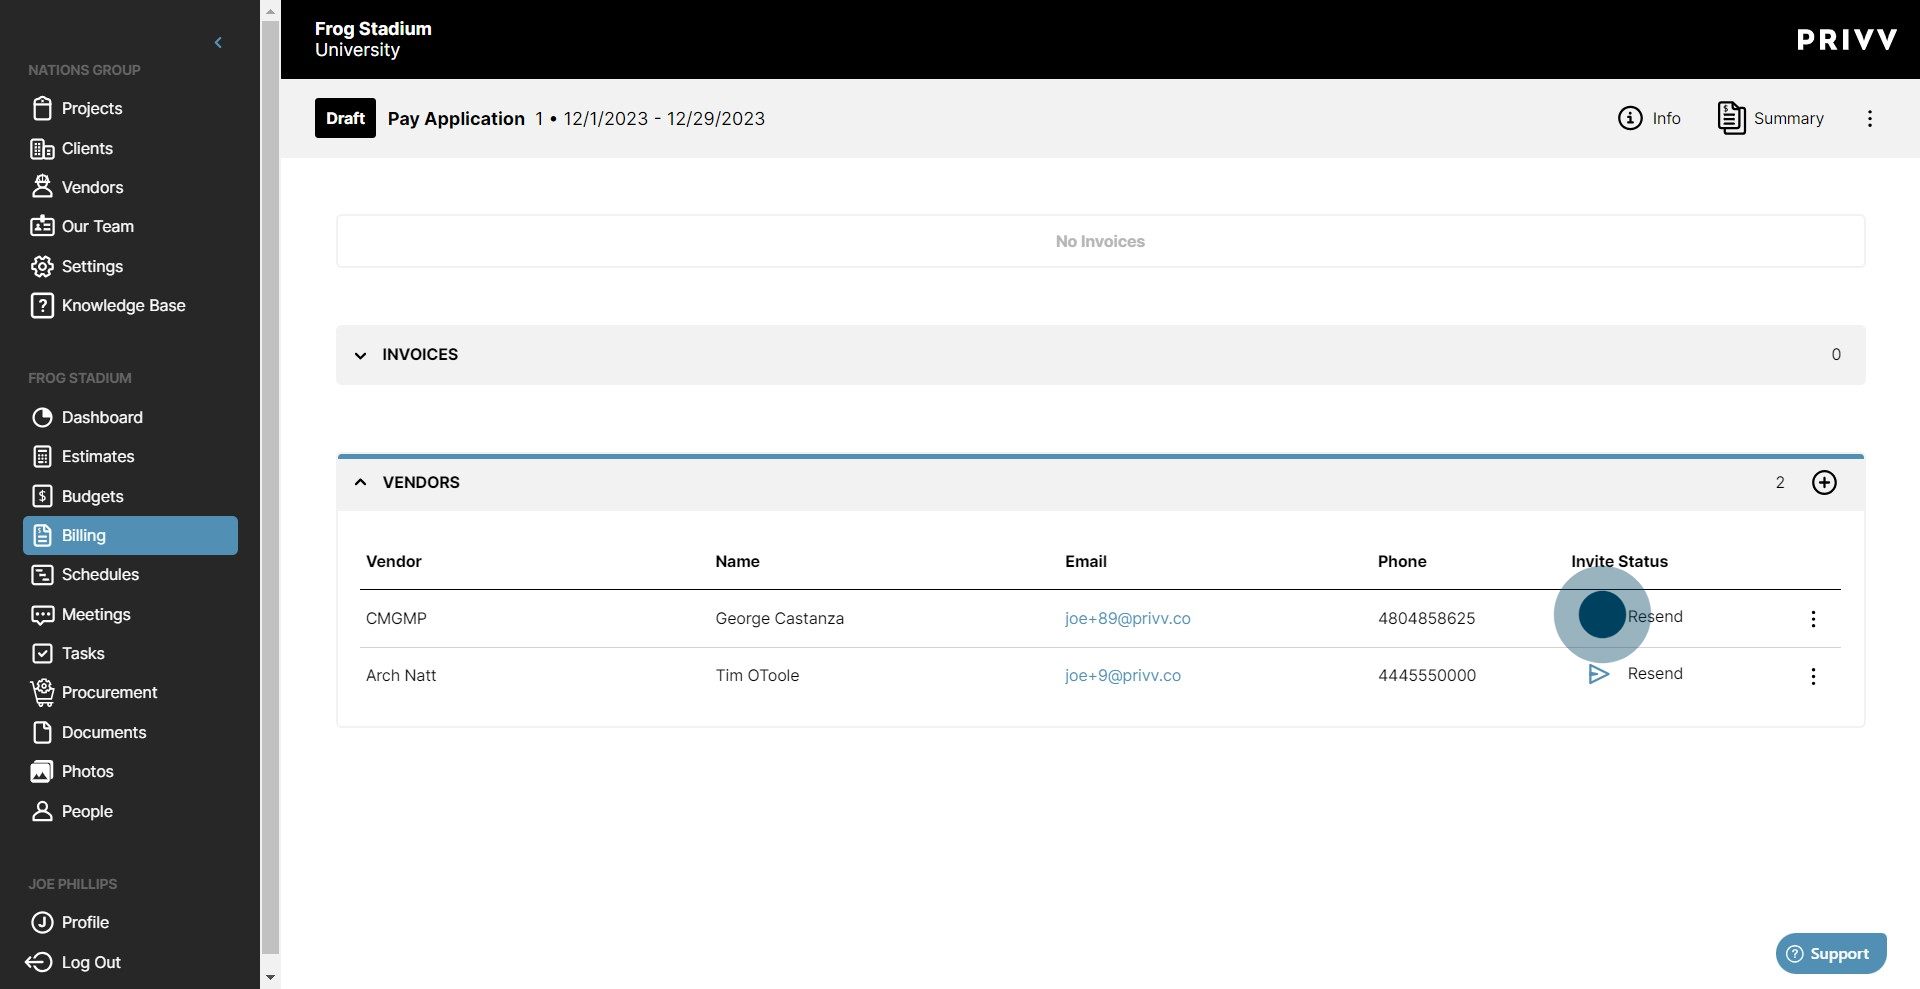
15. To cancel an invite, click on the vertical ellipses

16. Click cancel to block the vendor from submitting to this pay application.

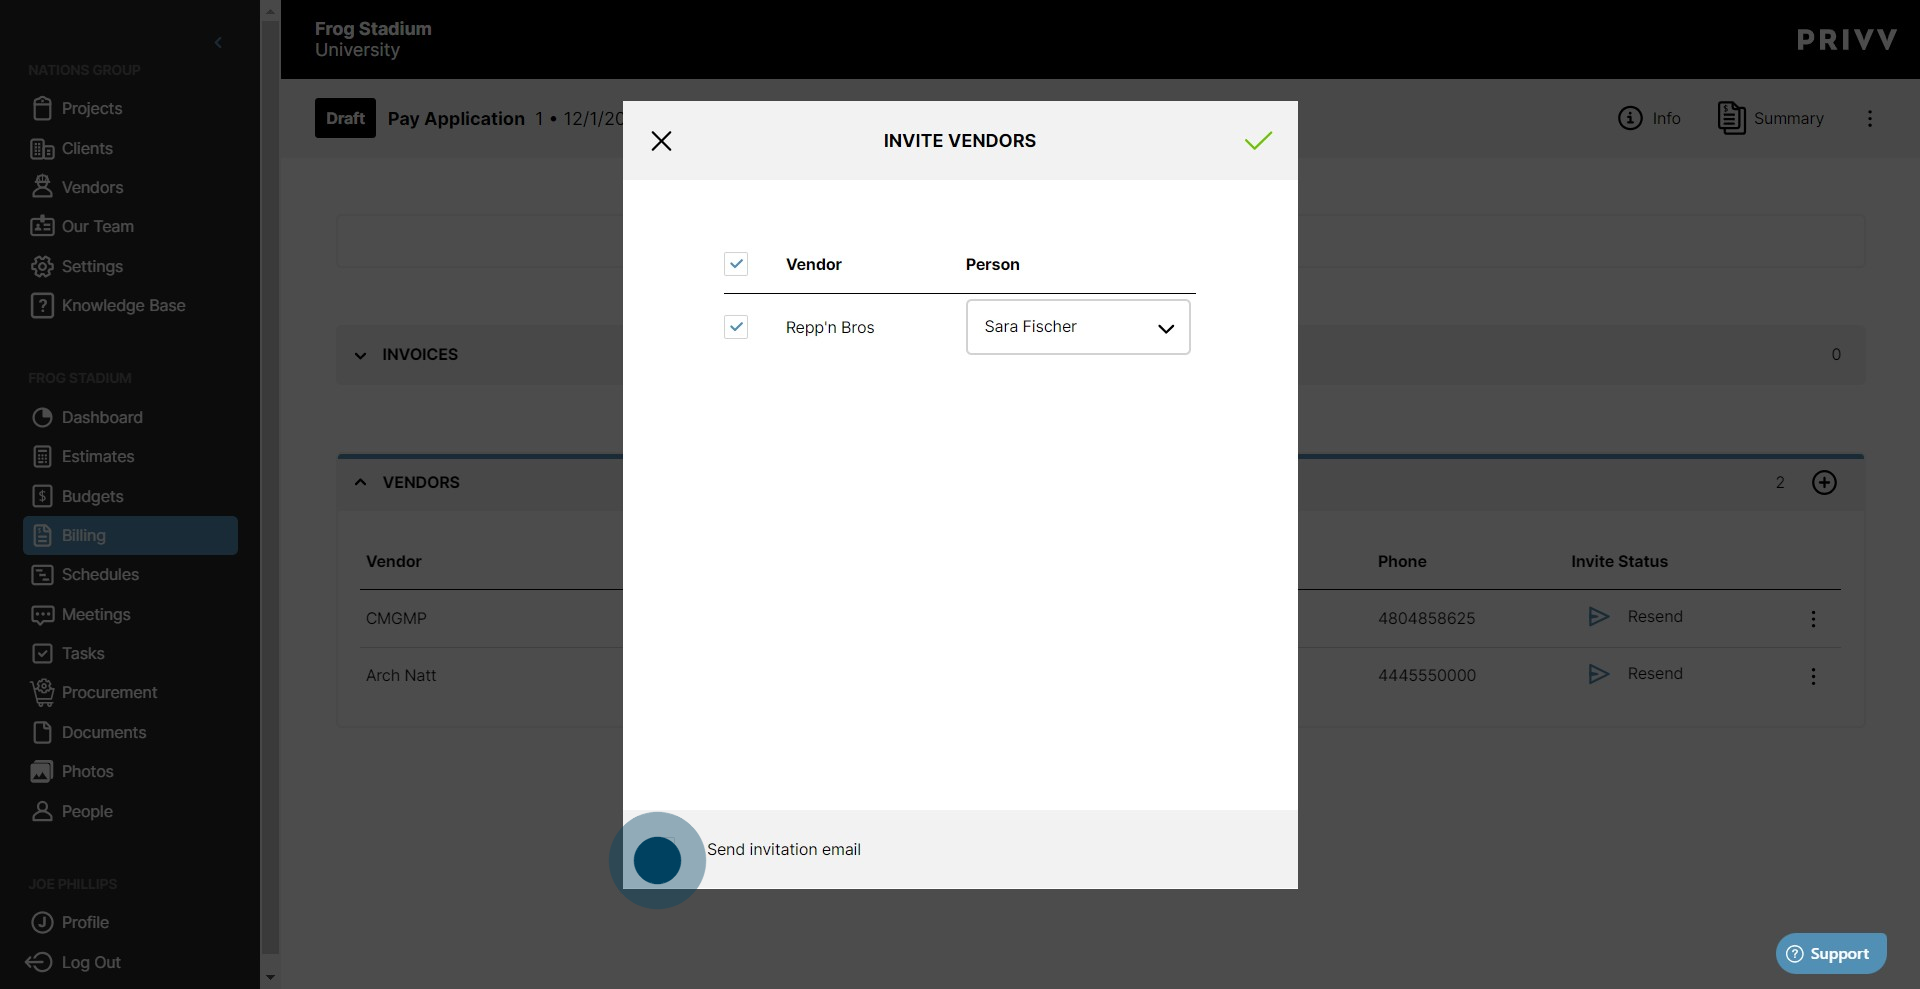
17. You can add other vendors to the pay app by clicking the + icon. In some cases you may have the desire to add vendors ahead of time without sending the invite. Here is where you can do that.

18. Click the + icon

19. All of your project's vendors will be listed here. Select the contact person for the vendor to add them to the pay application.

20. By default, the "Send Invitation Email" option is unchecked. To automatically send the invite, check the box here.

21. If you want to add the vendor to the pay application but send the invite at a later date, leave the box unchecked. You will have the option to send the invite at a later date by clicking the "Send" button in the "Invite Status" column.
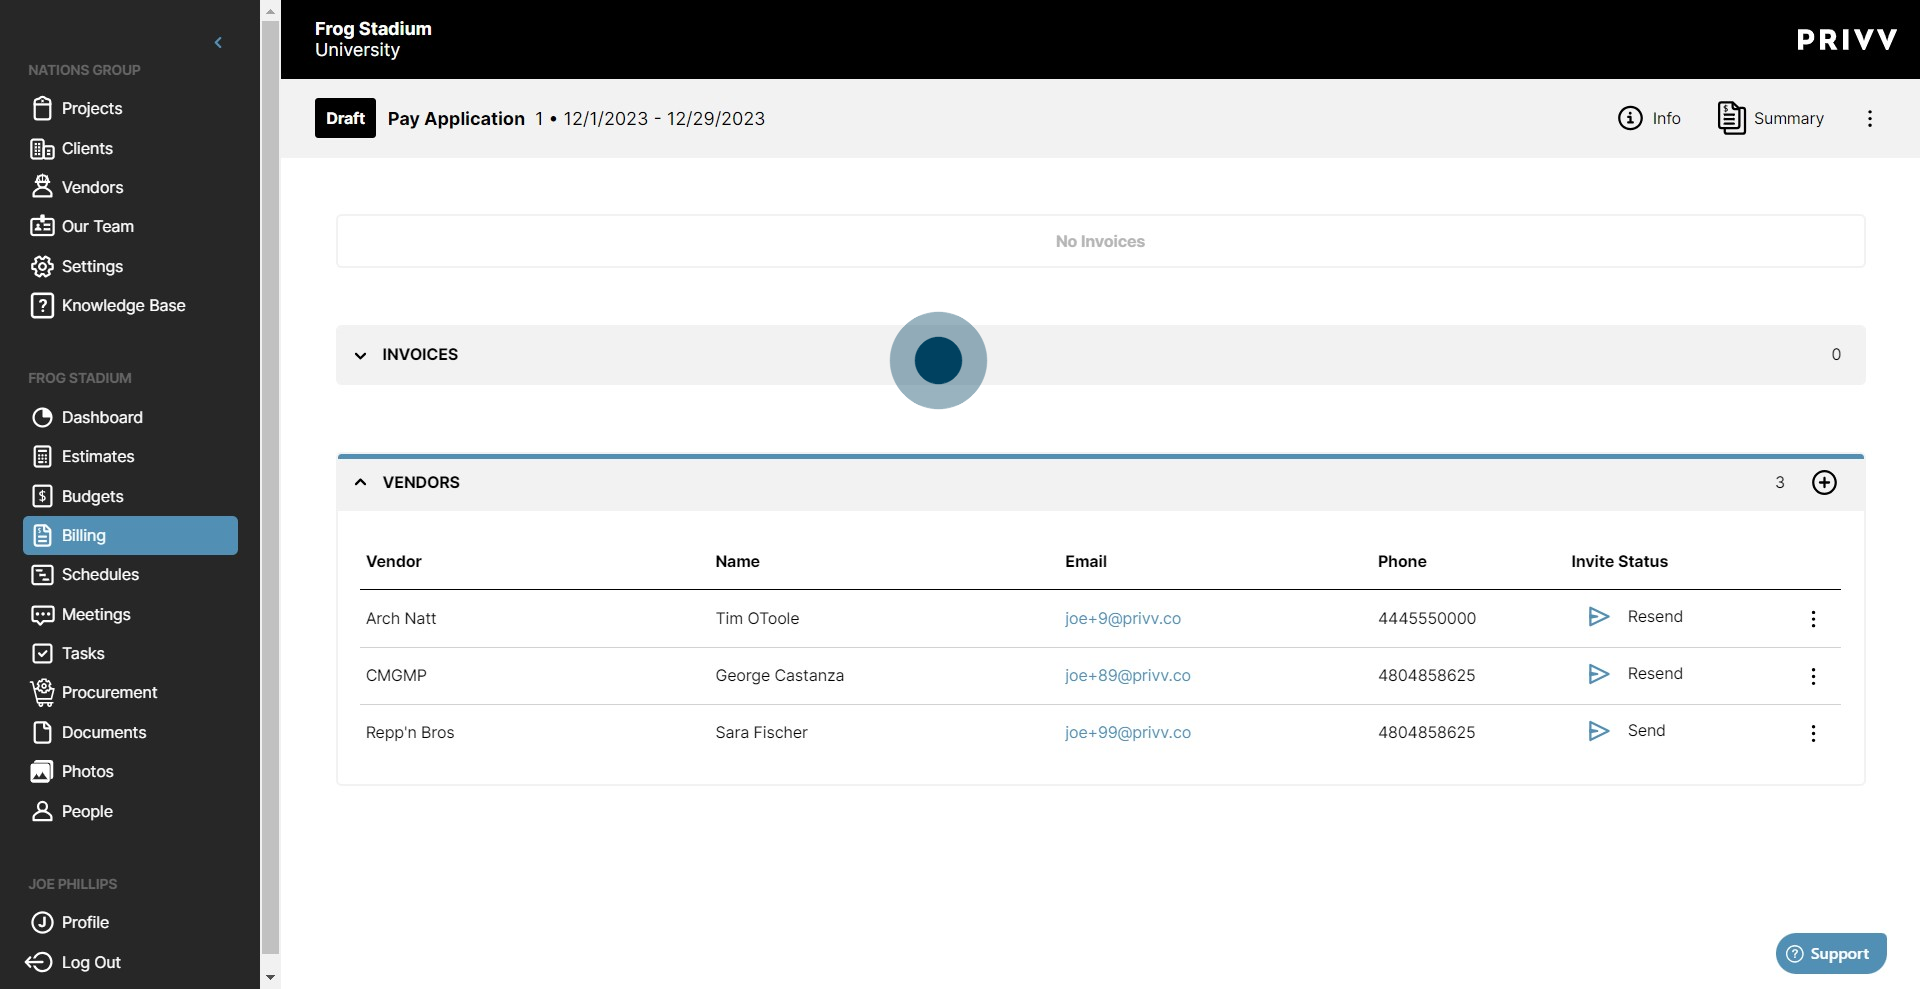
22. When you are satisfied with your added vendor list, click the green check mark.

23. The "Invite Status" column now shows which vendors have been sent an invite, "Resend", and which vendors have not, "Send". Clicking the "Send" button will automatically send the invite to the contact person listed.


25. When the vendors submit their invoices, you will see it listed here in the "Invoices" dropdown.
26. That was easy right? In the next Tutorial "Step 2: Accept/Reject Vendor Invoices" we will cover the necessary steps to edit, accept, reject or add the vendor submitted invoices to a pay application. You're on a roll! Click to the next page to follow along with us on finalizing the Vendor Invoices!

Was this article helpful?
That’s Great!
Thank you for your feedback
Sorry! We couldn't be helpful
Thank you for your feedback
Feedback sent
We appreciate your effort and will try to fix the article