Vendor Tutorial: How to Submit an Invoice on Privv
Author:
Steps: 18
1. To get started, click on "Submit Invoice".

2. Here is where you set your password. Choose and enter your login password. *You will only have to do this if you do not already have a login and password set up for Privv

3. Confirm that you "I agree to the Privacy Policy and Terms" by clicking on the associated checkbox.

4. Afterwards, click on "Create Account".

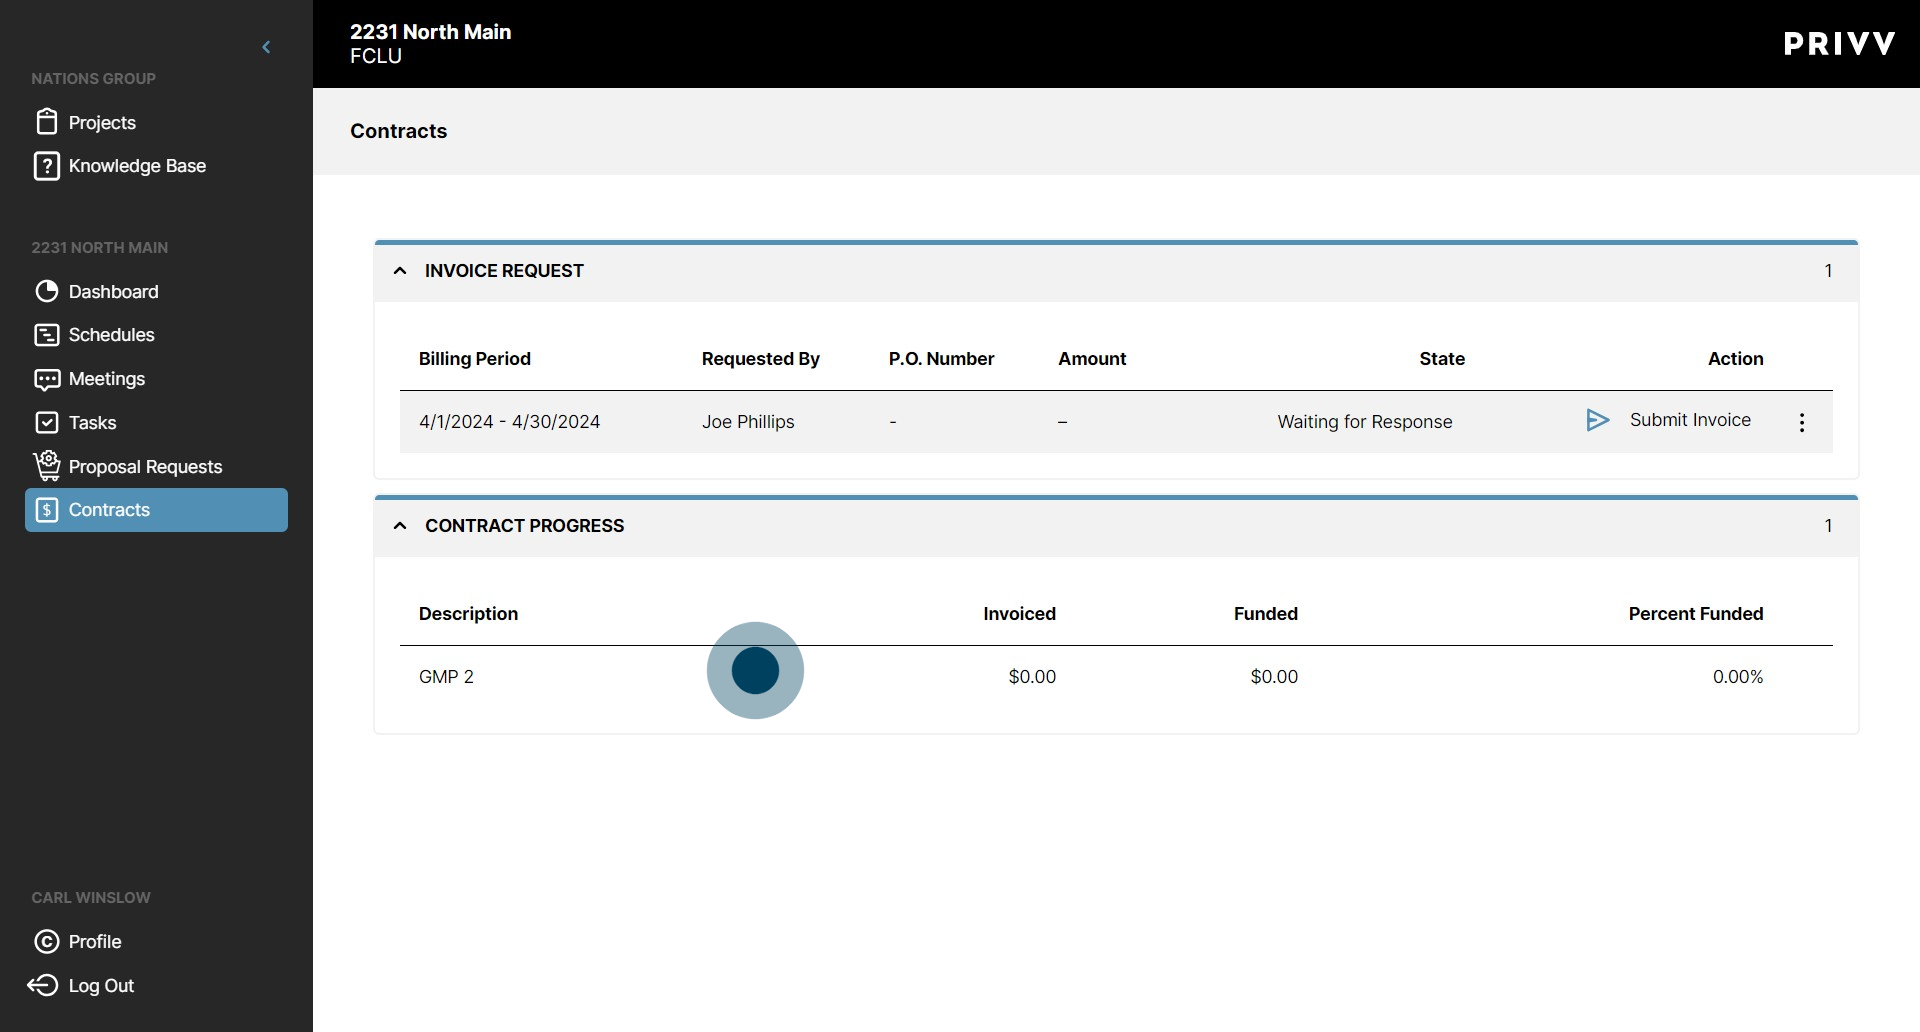
5. Now you are in! This is the "Contracts" Module where you can review past invoices and submit new ones. Click on "Contract Progress" to review past invoice progress.
6. As Invoices are submitted, you will be able to see the total amount invoiced-to-date, The amount paid or "Funded", and the percentage of total invoiced amount funded. In this example, no other invoices have been submitted yet.
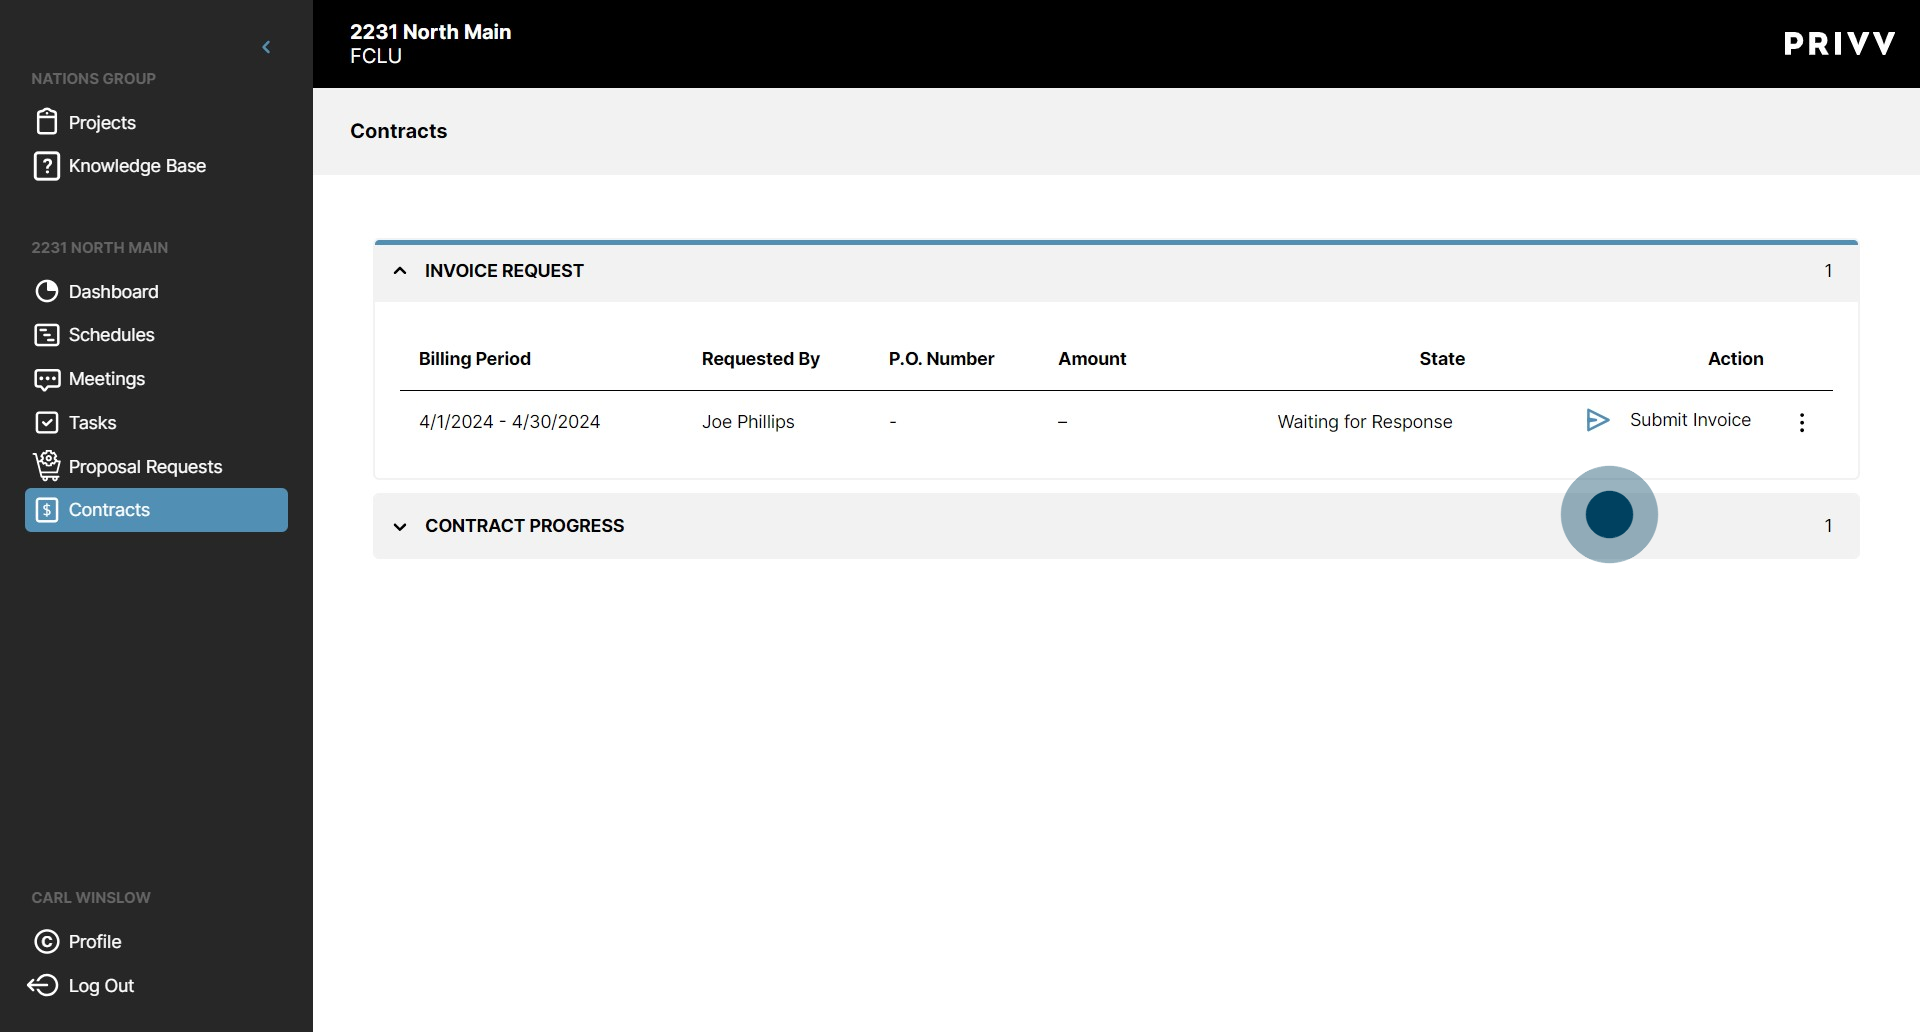
7. Let's submit a new Invoice. Click "Submit Invoice", in the "Invoice Request" section, to get started.

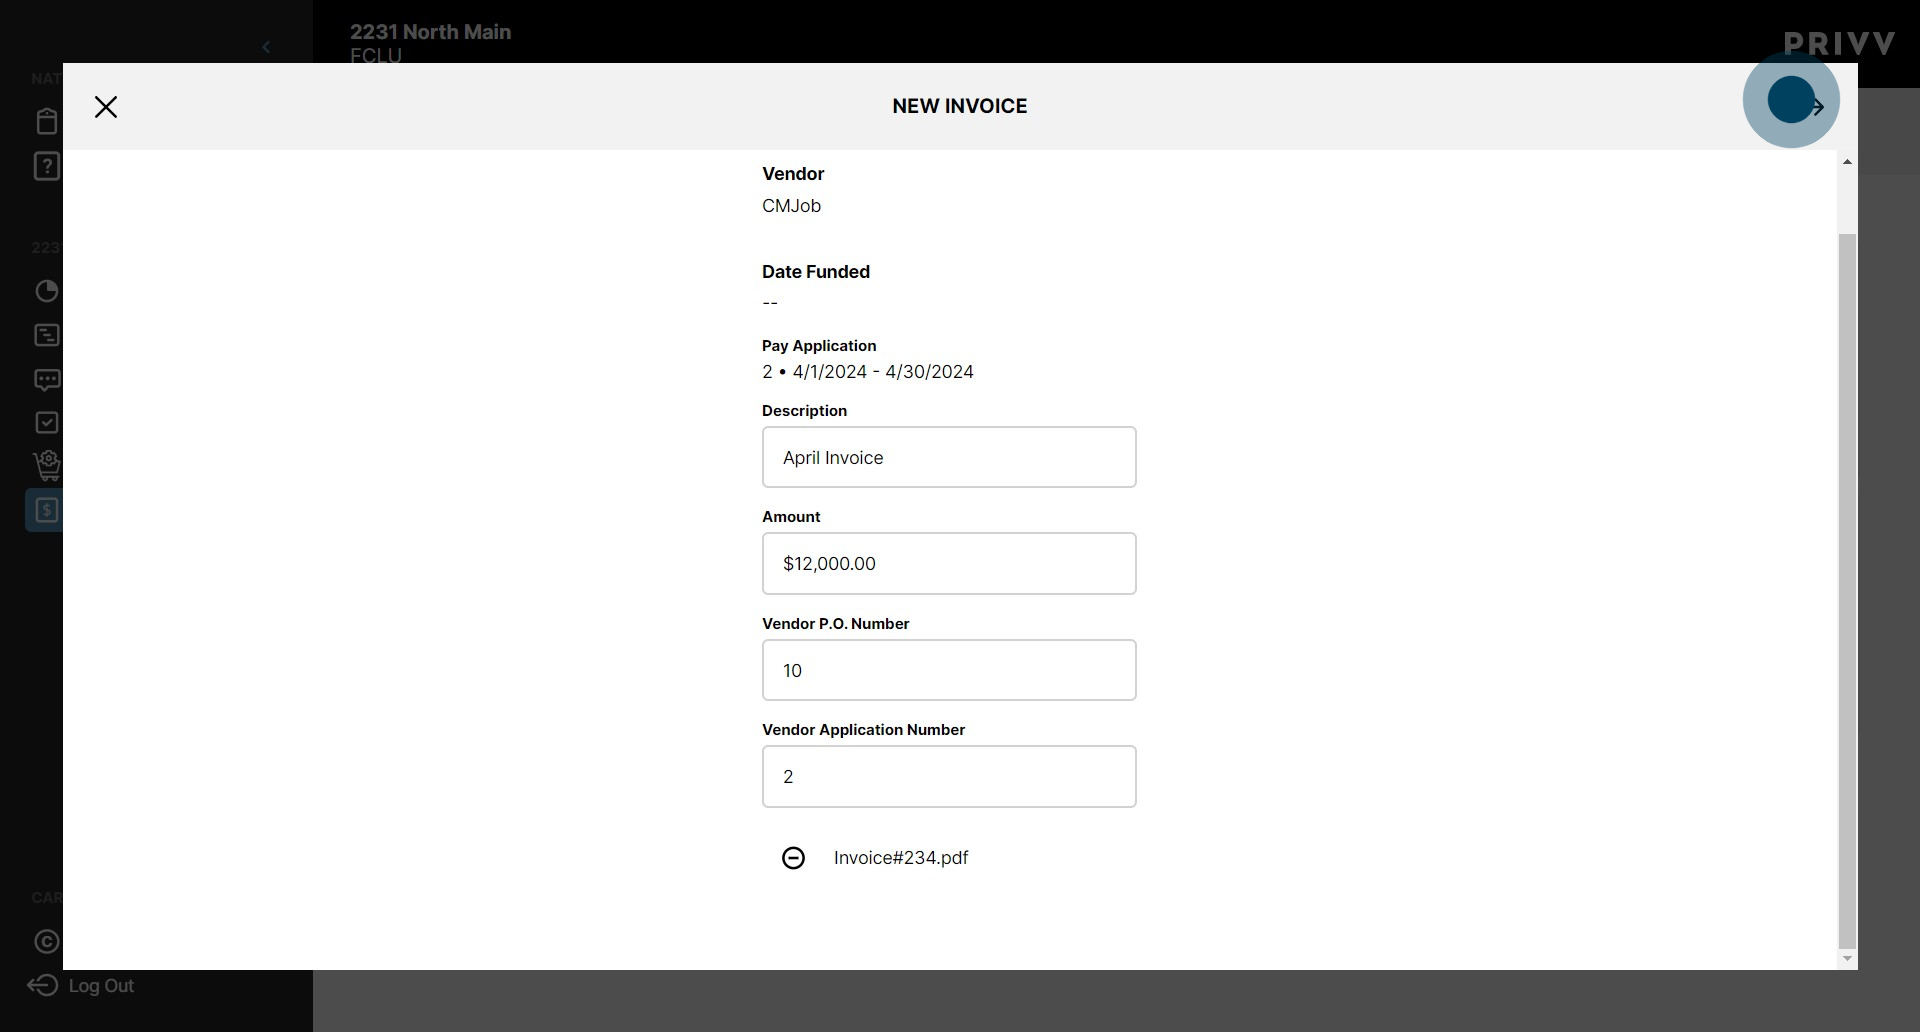
8. Enter your invoice description within the selected input.

9. Enter the total amount of your invoice within the selected input.
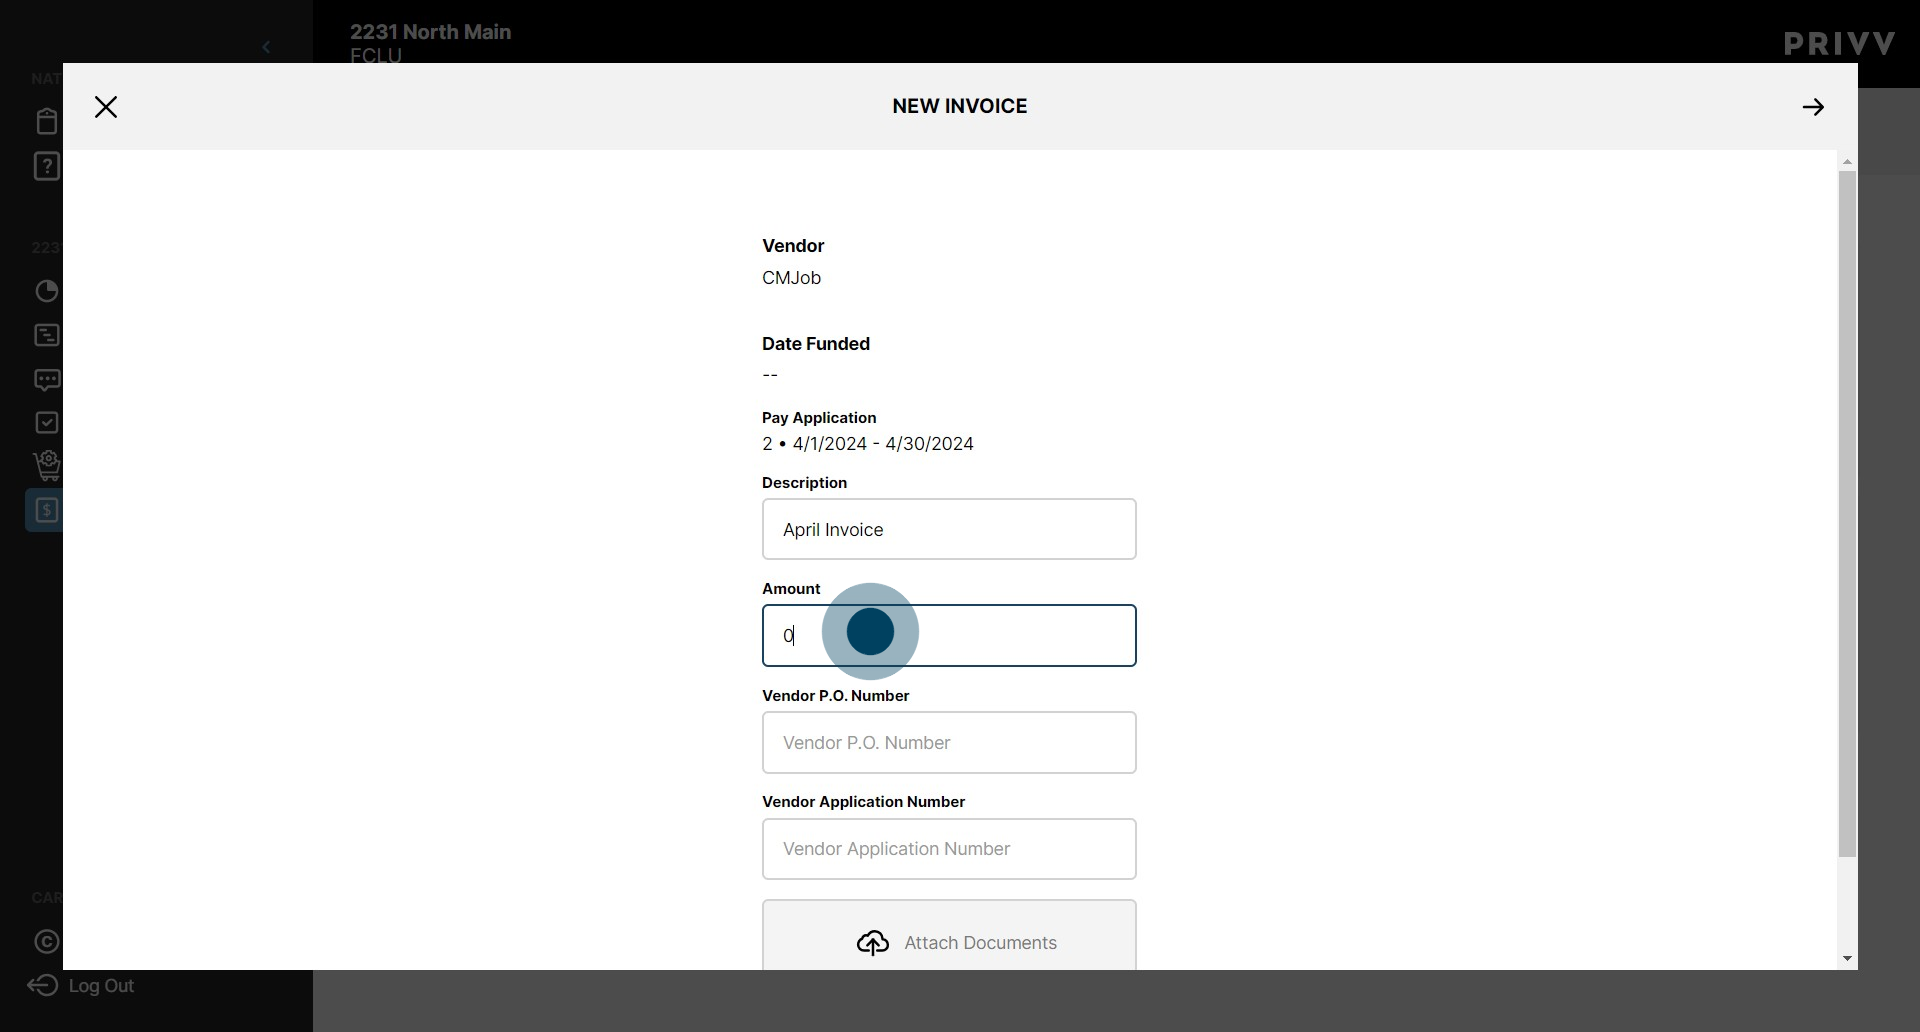
10. Enter your Vendor P.O. number in the selected input.

11. Enter your Application number within the selected input.

12. Upload your invoice file by clicking here. *You MUST attach a document to complete the invoice submittal.

13. When you are finished filling out the form, click on the "Next" arrow.
14. This section allows the user to allocate invoiced amounts across any line items associated with the Vendor. In this example, there is only one allocation option. Click here to enter the full invoice amount. *The total amount allocated MUST balance with the total Invoice Amount for your invoice>

15. Once that's done, click the Green checkmark here to submit the invoice.

16. Congratulations! Your Invoice Request has been submitted!

17. Click here for the option to view details of your submitted invoice.

18. If you have been assigned to other projects with this organization, you can access those projects by clicking here on the "Projects" tab. Repeat the steps for each project where a request has been made.

Was this article helpful?
That’s Great!
Thank you for your feedback
Sorry! We couldn't be helpful
Thank you for your feedback
Feedback sent
We appreciate your effort and will try to fix the article